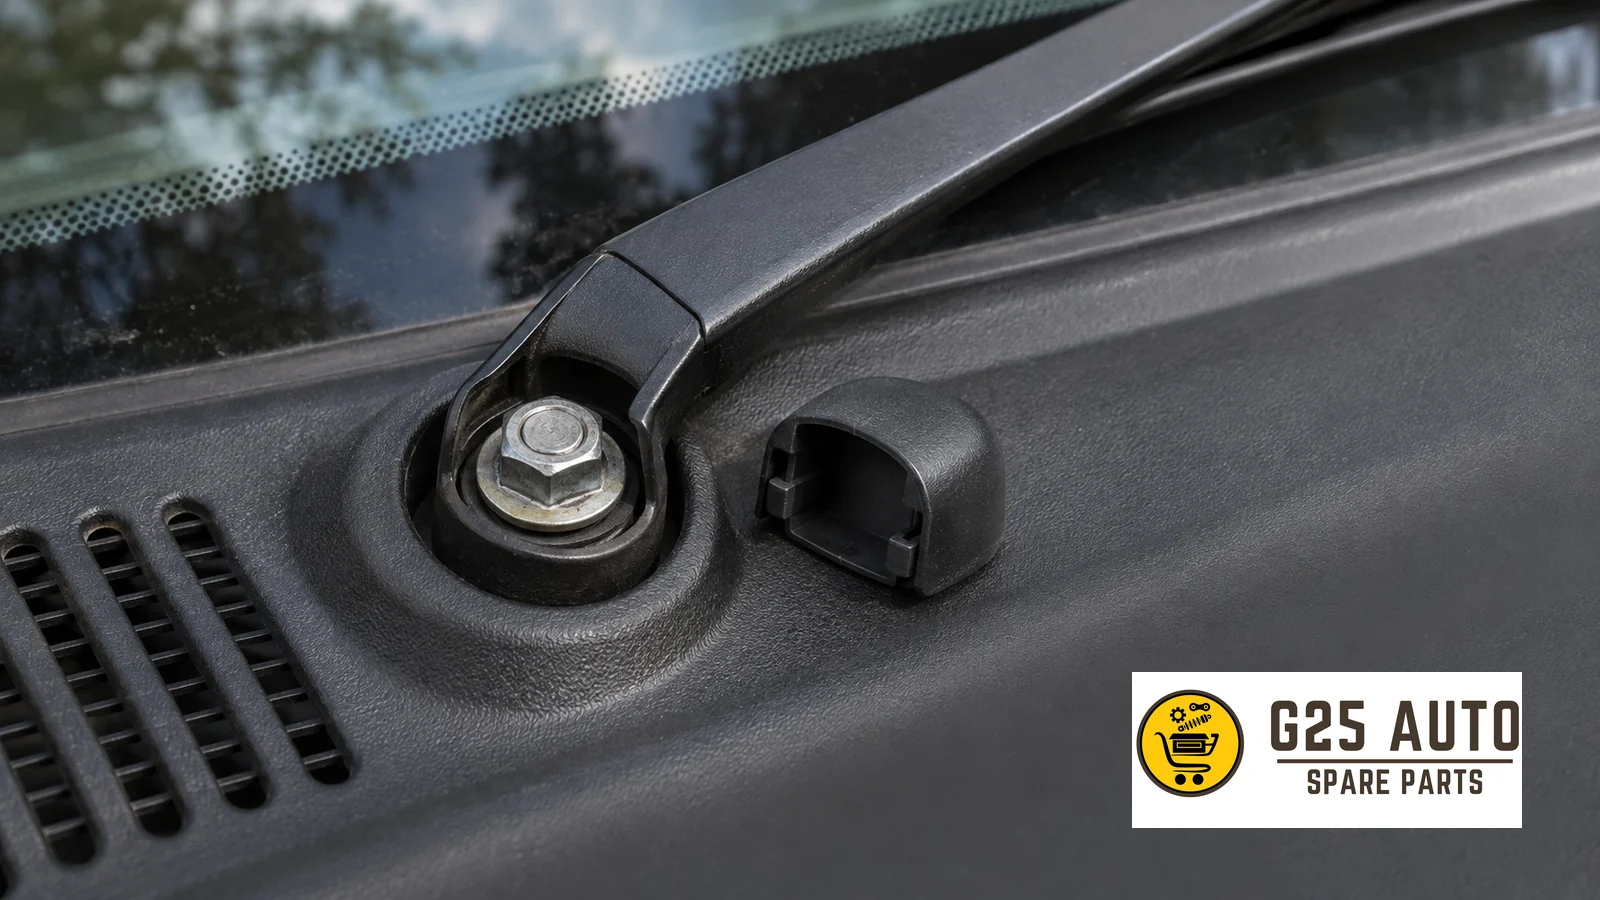
The wiper arm nut secures the arm to its pivot shaft. A protective cap covers the nut and the mounting point. If the arm comes loose, it can wobble, move out of its usual position or come off altogether. This guide explains what to inspect and how to choose the correct nut or cap.
What Are the Wiper Arm Nut and Protective Cap?
The wiper arm nut is the fastener at the base of the arm. It holds the arm on the threaded end of the wiper pivot shaft. The plastic cap fits over the fastening point and helps shield it from rain, snow, dust and dirt. It also gives the base of the arm a finished appearance.
What Do These Parts Do?
- Secure the wiper arm to the pivot shaft.
- Keep the arm seated while it moves.
- Cover the mounting point and help limit exposure to moisture and dirt.
- Finish the appearance of the wiper arm base.
Signs of a Problem
Check the arm and its mounting point if it starts to move erratically. A damaged cap is easy to spot, while a loose arm or unusual noise calls for a closer inspection.
Common Signs
- Loose wiper arm: The arm has play at its base or wobbles as it moves.
- Arm coming off the pivot: The arm can slip or detach if the fastener no longer holds it.
- Uneven wiping: The arm skips or leaves part of the glass unwiped.
- Broken or missing cap: The cover is cracked or has come away from the mounting point.
- Corrosion at the mounting point: Rust is visible around the exposed fastener.
- Unusual sounds: The wiper makes a rattle or knocking noise in use.
How to Diagnose the Problem
Inspect the cap, nut and pivot before ordering parts. Similar symptoms can come from other parts of the wiper mechanism.
Inspection Steps
Visual inspection:
- Park the wipers and switch off the vehicle before inspecting the arms.
- See whether the cap is present and intact.
- Remove the cap as directed for the vehicle and inspect the nut and mounting point.
- Look for corrosion, cracks and damage to the fastener or mounting point.
Mechanical checks:
- With the wipers switched off, check for play at the base of the arm.
- Check whether the nut is loose. Use the vehicle-specific procedure to assess and tighten it.
- Keep your hands and tools clear when testing the wipers. Observe whether the arm moves smoothly and returns to its park position.
- Check for the same symptoms at different wiper speeds.
Professional diagnosis: If these checks leave the cause unclear, have a technician inspect the mechanism. The pivot shaft or another component may be responsible.
Original and Aftermarket Parts Compared
When replacing a nut or protective cap, compare the original and aftermarket options using the vehicle and part identification details.
Comparison Table
| What to check | Original part | Aftermarket part |
|---|---|---|
| Fit | Match the part reference to the exact vehicle and mounting position. | Check the manufacturer’s fitment listing for the exact application. |
| Specification | Use the vehicle manufacturer’s part reference. | Check the specification and mounting details against the original application. |
| Options | Use the catalogue to identify the specified nut or cap. | Compare the alternatives listed for the application. |
Which Should You Choose?
An original part may be a straightforward choice when you can confirm its catalogue reference. If you choose an aftermarket part, verify the fitment and compare the fastening or clip design before ordering. Check the applicable warranty terms if they matter to the repair.
Checklist for Choosing the Correct Part
Part Selection Checklist
- Make and model: Use the complete model designation.
- Production date: Check whether the catalogue distinguishes between production periods.
- Vehicle configuration: Use engine or trim details where the catalogue asks for them.
- VIN: Use it with a vehicle parts catalogue or ask a supplier to verify the application.
- Part reference: Record any legible identifiers on the existing part.
- Appearance and attachment: Compare the part and its mounting details with the replacement listing.
Why Part References and VIN Checks Matter
What Is an Original Equipment Part Reference?
It is the identifier the vehicle manufacturer uses for a particular part. Two parts may look alike and carry different references. Use the reference together with the catalogue fitment information before assuming they are interchangeable.
Checking Fit With the VIN
A supplier or workshop can use the VIN to identify the vehicle in a parts catalogue. This is especially helpful if there was a production change within the same model range or if the fitment depends on the vehicle configuration.
Engine Code and Production Date
If the parts catalogue distinguishes between variants by engine code or production date, have those details ready when checking the listing.
Choosing a Supplier
What to Look For
- Help confirming fit against the VIN and part reference.
- Technical support if the catalogue shows several options.
- Clear return or exchange terms.
- A clear distinction between original parts and aftermarket alternatives.
Fitting and Replacing the Nut or Cap
What You Will Need
- The correct replacement nut or protective cap.
- The tools specified for the fastener, including a torque wrench when the procedure calls for one.
- A cloth for cleaning the mounting area.
General Fitting Steps
Consult the service procedure for the vehicle before starting. The exact method for removing the cap or arm and tightening the nut depends on the vehicle.
- Let the wipers return to their park position, then switch off the vehicle.
- Remove the protective cap carefully using the specified method.
- Remove the nut with the appropriate tool.
- Inspect and clean the mounting point.
- If the arm needs to come off, mark its parked position where appropriate and remove it using the vehicle procedure.
- Inspect the exposed shaft and refit the arm in its correct position.
- Fit the nut and tighten it to the torque specified for the vehicle.
- Refit the protective cap.
- With hands and tools clear, test the wipers for smooth movement and correct parking.
Maintenance
What to Check
- Keep the mounting area clear of dirt during routine cleaning.
- Check that the protective cap is secure and intact.
- Inspect the mounting point for corrosion or looseness if the wiper starts to move irregularly.
- Avoid forcing the wipers against ice or heavy dirt on the glass.
Frequently Asked Questions
When Should the Wiper Arm Nut Be Replaced?
Replace the nut if it is damaged, its threads are unusable or it can no longer secure the arm. Inspect the shaft as well if the fastening point is damaged.
What Happens if the Protective Cap Is Missing?
The mounting point is more exposed to water and dirt. Check that the arm is secure, inspect the uncovered fastener and fit the correct replacement cap.
Do All Vehicles Use the Same Nut?
Nuts and caps can differ between models and versions. Check the application for the exact vehicle before ordering.
Will an Aftermarket Part Affect the Warranty?
Check the terms of the vehicle warranty and ask the warranty provider if you need the conditions clarified.
Can I Fit the Part Myself?
Follow the vehicle-specific procedure and use the correct tools. If you are unsure how to remove or align the arm or tighten the nut, ask a technician to fit it.
What Affects the Replacement Cost?
The vehicle, the part you need and any labour involved affect the cost. Ask the supplier or workshop for a quote for your specific repair.
Conclusion
Check the cap, nut and pivot if the arm becomes loose or stops wiping in its usual path. Confirm the part reference and vehicle fitment before ordering, then follow the specified fitting procedure and check that the wiper moves and parks correctly.