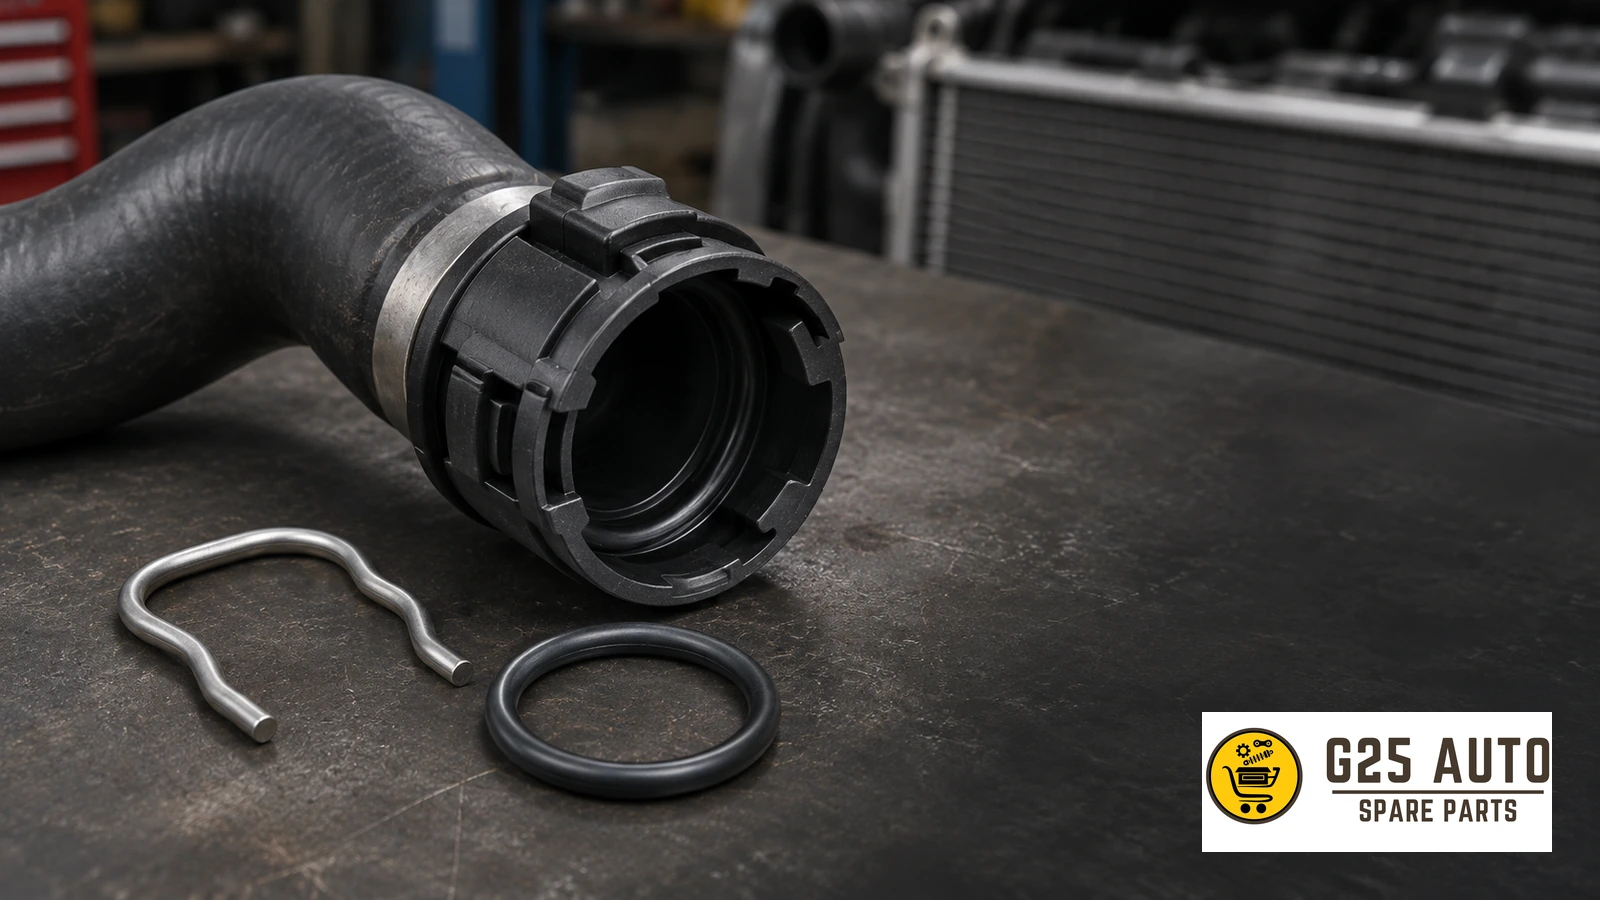
On an upper radiator hose with a quick-connect fitting, the retaining clip holds the hose connector in place and the O-ring seals the joint. Together they keep coolant inside the connection while the cooling system is under pressure.
Why the Radiator Hose Connection Matters
The upper radiator hose carries hot coolant from the engine to the radiator. Its connections have to stay secure and sealed as coolant temperature and pressure change.
What the Retaining Clip Does
The retaining clip mechanically secures the hose connector to its mating fitting. It holds the connection in place through vibration and changes in temperature and pressure.
How the O-Ring Seals the Joint
The O-ring closes the gap between the connector and its mating surface. The seal must be compatible with the coolant and rated for the application.
Common Problems and Warning Signs
A leak at a radiator hose connection can lower the coolant level and contribute to overheating. Finding where the coolant escapes helps determine which part needs attention.
Signs You May Notice
- Coolant traces in the engine bay or where the vehicle is parked.
- Dampness or wetness around a hose joint.
- An engine temperature reading higher than usual.
- A coolant level that keeps falling in the expansion tank.
- A sweet coolant smell from the engine bay.
- Dried residue around the hose fitting.
Signs of O-Ring Damage
- Seepage around the connector, sometimes visible as a thin film of coolant.
- A leak that appears only once the cooling system warms up.
- Coolant escaping from the joint during a pressure test.
- Cracks, hardening or deformation on the seal once removed.
Signs of a Retaining Clip Problem
- A hose connector that sits loose on its fitting.
- A cracked, broken or distorted clip.
- A clip that has shifted or sits partly out of its retaining groove.
Diagnosing a Leak at the Connection
A visual inspection and, where appropriate, a cooling system pressure test can help pinpoint the leak.
Visual Inspection
With the engine cold, inspect the hose joints and check the position of the clips. Look for dried coolant and signs of damage. If the connection is dismantled, inspect the seal and its mating surfaces.
Pressure Testing
Use the test pressure and procedure specified for the vehicle. Watch the hose joints for seepage while the system is under test.
Checking for a Temperature-Dependent Leak
Some joints only seep when warm. A technician can check for that pattern following the vehicle’s service procedure. Keep the cooling system closed while it is hot or pressurised.
Comparing Original and Aftermarket Parts
| Check | Original part | Aftermarket part |
|---|---|---|
| Fitment | Confirm the reference in the vehicle manufacturer’s catalogue. | Cross-reference the replacement with the original part number and the fitting design. |
| Material specification | Check the specification for the vehicle’s cooling system. | Check the supplier’s stated specification and coolant compatibility. |
| Availability | Ask the parts outlet about the exact reference. | Check stock for the matching replacement. |
| Warranty terms | Check the terms for the part. | Check the supplier’s terms for the part. |
Checklist for Choosing the Correct Part
- Original part number. Record the number on the existing part if it is readable.
- Vehicle identification number. Have the VIN ready for a catalogue lookup.
- Engine code. Check which engine is fitted to the vehicle.
- Production date. Check for revisions made during the model’s production run.
- Hose and connection size. Verify the dimensions specified for the fitting.
- Connection type. Confirm whether the hose uses a quick-connect fitting or another attachment design.
- Seal specification. Confirm that the O-ring is specified for the coolant and fitting.
Installation and Maintenance
Preparing the Connection
Make sure the seating surfaces are clean and smooth before fitting the seal and clip. Follow the service procedure for removing residue without scoring the sealing surface.
Fitting the Seal and Clip
Seat the O-ring in the correct groove. Use the assembly method specified for the vehicle, including any specified lubricant. Check that the connector is fully seated and the retaining clip is engaged in its locking position.
Checking the Joint After Installation
Refill and bleed the cooling system according to the vehicle’s service procedure. Inspect the connection for leaks as part of the prescribed checks after refilling.
Choosing Between Original and Aftermarket Parts
When to Choose the Original Part
Check the vehicle’s warranty terms if it is still under warranty. Consult the manufacturer’s catalogue for applications that call for a particular clip or seal.
When to Consider an Aftermarket Part
Choose a replacement from a supplier who identifies the original reference it replaces and states the specification for the exact fitting.
How to Verify Fitment
Hose fittings can vary between engines in the same model. Check the clip and seal against the specific connector used on the vehicle.
Original Part Reference
Use the number on the existing part, when available, to look up the corresponding catalogue entry.
VIN Lookup
Give the supplier the VIN to narrow down the catalogue application for the vehicle.
Engine Code and Production Date
Check both details when the catalogue lists different hose connections for the same model year.
Frequently Asked Questions
Can I reuse the retaining clip?
Check the vehicle’s service instructions for the fitting. Replace the clip if the procedure calls for a new one or if it is cracked, distorted or unable to lock securely.
How often should I replace the O-ring?
Follow the vehicle’s service instructions when the joint is opened. Check whether the seal must be renewed during hose replacement, and replace a damaged or hardened seal.
Is replacing the O-ring enough to stop a leak?
Identify the cause before ordering parts. Inspect the seal, clip, mating surfaces and hose. A swollen, softened or cracked hose or a damaged clip can also require replacement.
Can I do the replacement at home?
The job includes refilling and bleeding the cooling system. Have a technician do the work if you are unfamiliar with the procedure for your vehicle.
Do all hose connections use the same O-ring?
The upper and lower radiator hoses and the heater hoses may use seals with different diameters or thicknesses. Check the specified seal for each connection.
What to Check During Cooling System Service
Inspect the retaining clip and O-ring when servicing the upper radiator hose connection. If a part needs replacing, confirm the fit using the original reference, VIN, engine code and production date. Check the joint for leaks after the system has been refilled and bled.