
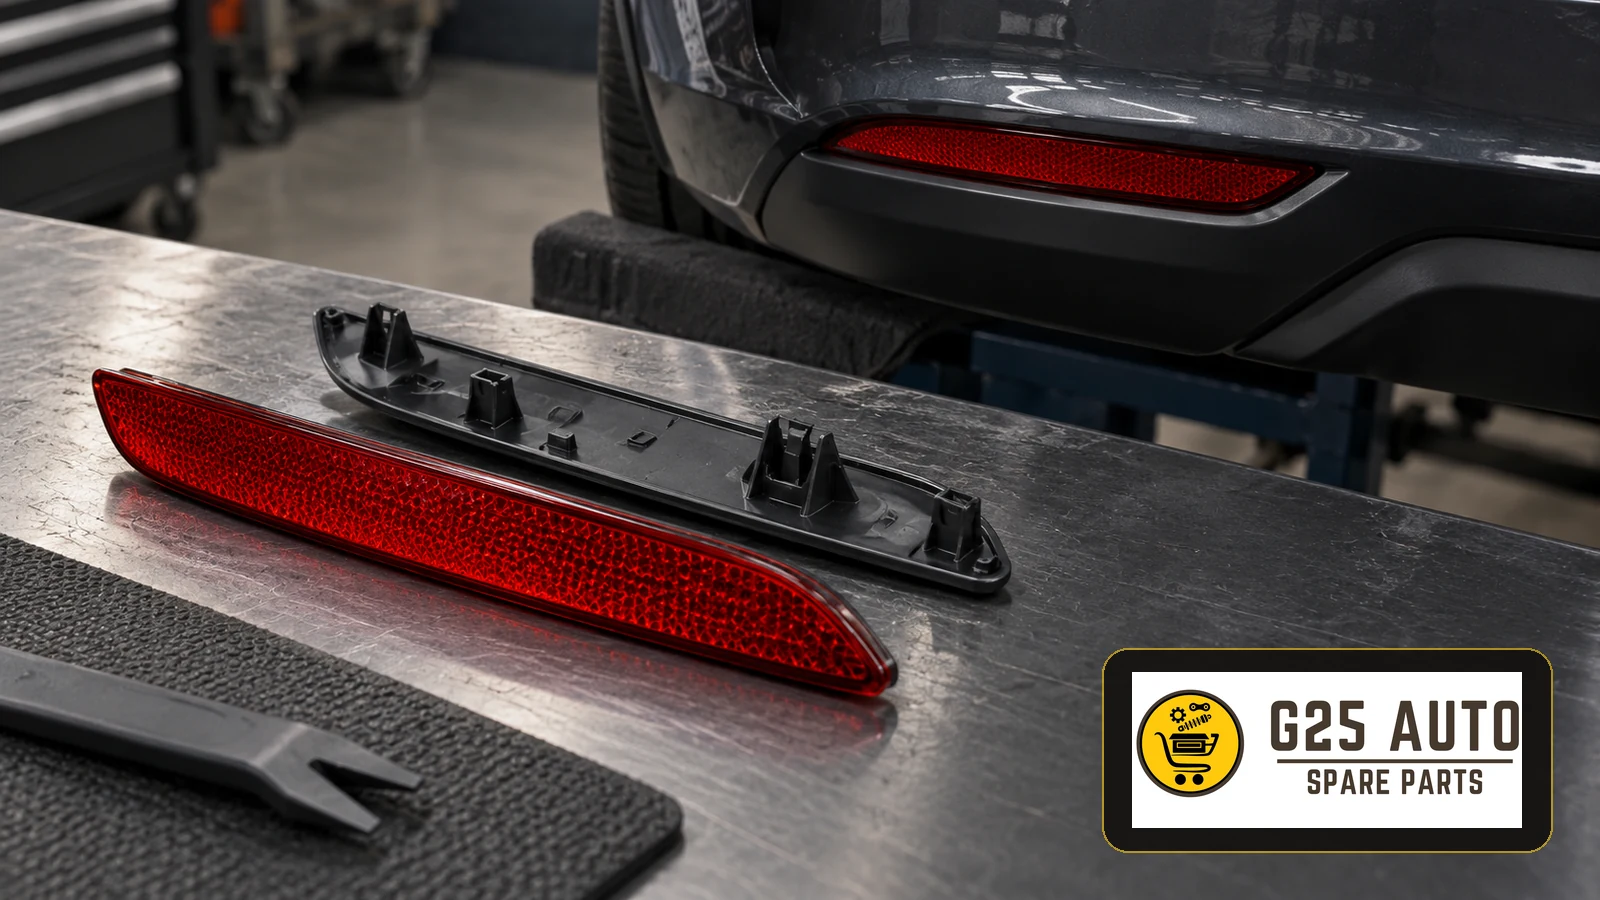
A loose rear bumper reflector needs its lens, retaining features and bumper mounting area checked together. Replacing the reflector alone will not correct a broken mounting pocket, while an intact lens may still need replacement if its moulded clips cannot be serviced. For European and Balkan workshops and parts distributors, the first decision is to identify the fitted assembly and establish which damaged components the manufacturer permits you to repair or replace.
Understand the reflector and its mounting
A passive reflex reflector returns incident light towards its source; it does not need a bulb or an electrical supply. Distinguish it from a rear fog lamp, marker lamp or an assembly that combines lighting functions. Similar red lenses can conceal different constructions, so confirm the function in the vehicle documentation before starting an electrical diagnosis or ordering a replacement.
The mounting may include locating lugs, flexible tabs, separate retainers or fasteners. The receiving pocket can be part of the bumper cover, a lower trim panel or a separate carrier. These are possible arrangements, not a universal three-piece system. A catalogue illustration and inspection of the actual bumper are more useful than assuming every clip and housing is sold separately.
Inspect the damage before choosing parts
Check the lens and the attachment points
Record cracks, missing sections, heavy abrasion, discolouration and any obvious distortion. Clean dirt using a method compatible with the component before assessing the surface. Compare its position with the intended mounting and inspect the receiving slots, retaining edges and surrounding bumper material. A reflector sitting proud can result from incorrect engagement, a mismatched part or damage behind it.
Look for evidence of contact or an earlier repair, but do not assign a cause from appearance alone. Water or dirt behind a bumper-mounted reflector does not by itself establish a body leak: determine whether that particular interface is intended to seal anything. Avoid pulling on the lens as a universal test; inspection and removal should follow the applicable procedure.
Establish whether the clip can be serviced
A separate retainer may be replaceable, whereas a broken tab moulded into the reflector can require a complete reflector. As an application-specific example, Tesla’s Model 3 rear fascia reflector procedure instructs replacement of the old reflector if its clips are broken. This illustrates why a clip-only repair cannot be assumed; it is not an instruction for other vehicles.
Build an accurate parts enquiry
Provide the VIN, production information, vehicle market specification and the fitted bumper variant. State left or right as viewed in the vehicle’s normal direction of travel. Include clear photographs of the lens, rear attachment features and damaged mounting area. Changes to bumper styling, lower trim or body equipment can affect the required part; model name alone may leave several candidates.
Use legible references on the old component as supporting evidence and check the current catalogue, supersessions and application notes. Not every small clip has its own readable or orderable reference. Confirm whether the quoted supply unit includes retainers, a carrier or only the reflector. A matching outline or a familiar reference does not remove the need to verify the actual interfaces.
Assess original and aftermarket products through their documented application, construction and relevant approval information. Do not infer equivalent optical performance from a glossy red lens or flexible-looking tabs. HELLA’s rectangular reflector range and its triangular reflector range illustrate that reflective components can use different mounting methods. These examples do not establish suitability as substitutes for a vehicle-specific bumper reflector.
Workshop and purchasing checklist
- Identify the vehicle, market specification, bumper variant and fitted reflector function.
- Specify the installation side using the vehicle’s direction of travel.
- Record lens condition and photograph all accessible attachment features.
- Inspect the receiving pocket, carrier and surrounding bumper for damage.
- Check current catalogue references, application notes and repair instructions.
- Confirm the supplied assembly and whether retainers are included or separately serviceable.
- Verify the proposed product’s application and relevant approval documentation.
- Record installation checks, adjacent equipment checks and any unresolved damage.
Plan the repair and verify the installation
Use the vehicle procedure to establish access, the release direction and any necessary trim or bumper removal. Protect painted surfaces and support removed components appropriately. Where access involves wiring or nearby equipment, follow the specified precautions. A simple-looking reflector does not prove that levering from the outside is the approved removal method.
Remove loose fragments and prepare the mounting area as directed. Check that the locating features align before engaging retainers, and use any specified fastening settings. An audible click alone is insufficient evidence that every attachment is seated. If the pocket is distorted or torn, assess the approved bumper repair or replacement options before fitting another reflector.
Do not treat glue, extra screws or reflective tape as an automatic substitute for the intended retention or optical assembly. After installation, check seating, orientation, security and gaps against the vehicle information. Restore disturbed trim and check any equipment affected by the work. A hand-held light can reveal an obvious reflection, but it does not certify optical performance or correct fitment.
Frequently asked questions
Can only the broken retaining clip be replaced?
Only if the design and parts information support that repair. An integral broken tab can require the reflector assembly; a damaged bumper pocket needs its own repair assessment.
Will a damaged reflector always fail inspection?
Check the applicable national inspection rules. For example, Great Britain’s MOT manual distinguishes levels of damage and insecurity. Its classifications should not be applied automatically across European or Balkan markets.
Must both rear reflectors be replaced together?
Check the other reflector’s condition and the relevant repair information. Replacement scope should follow documented damage and requirements rather than an assumed paired replacement rule.
Is there a fixed replacement interval?
Use the vehicle maintenance guidance and respond to observed damage or looseness. Do not assign a universal service life or promise that routine visual checks guarantee an inspection pass.