
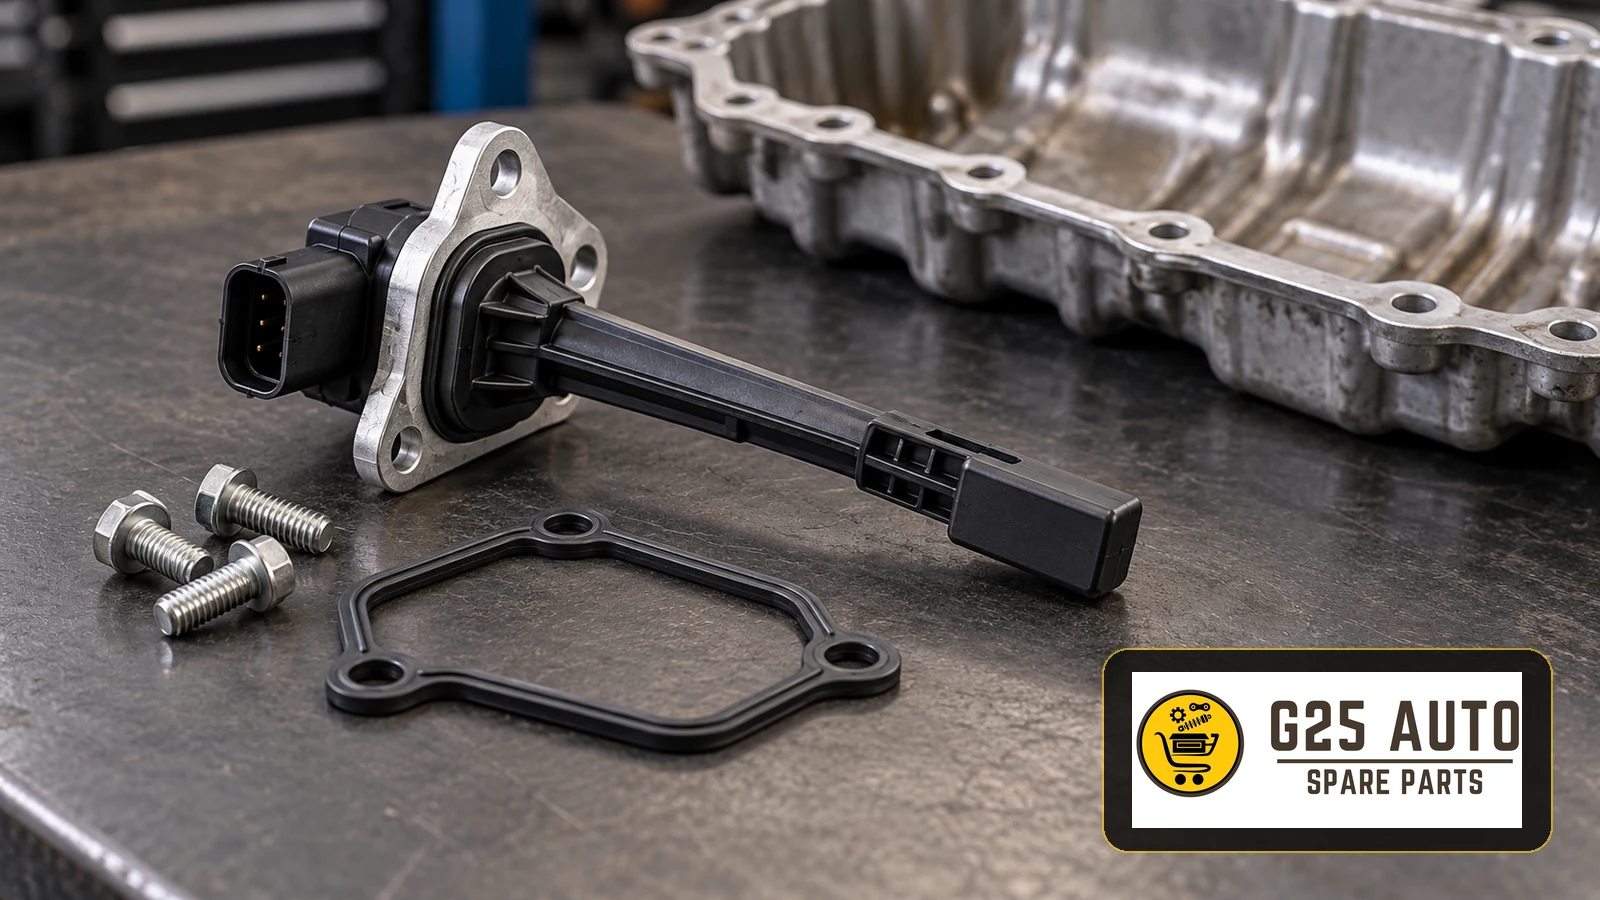
The engine oil sump level sensor seal and its connections help keep the oil system leak-tight and support reliable sensor operation. The seal closes the joint between the sensor and its sump mounting, while the fasteners and connector maintain the mechanical and electrical connections. Faults in this area can cause oil leakage or incorrect level readings; oil loss can eventually contribute to engine damage.
What Is an Engine Oil Sump Level Sensor Seal?
This sealing element may take the form of an O-ring or a specially shaped gasket. Its material and profile depend on the sensor design and specified application. It seals the contact between the sensor and the sump body to prevent engine oil escaping at that joint.
The sensor connections are also part of the system. Depending on the design, they include screws, bolts, nuts, a mounting flange and an electrical connector. Together, these components secure the sensor and maintain its electrical connection.
Fault Symptoms
Problems with the sump level sensor seal or connections can present several symptoms:
- Dashboard oil level warning: A persistent or intermittent warning may indicate an oil level or sensor problem. The warning alone does not identify the seal as the cause.
- Oil leakage: Oil traces beneath the engine or around the sump require investigation, including inspection of the sensor joint.
- Incorrect oil level readings: If the actual level is correct but the indicated level is wrong, investigate the sensor and its connections rather than assuming the gasket is responsible.
- Electrical faults: Corrosion or a loose connector can interrupt the signal.
- Oil beneath the engine: Spots or drips where the vehicle is parked may come from a leaking sensor seal, but other leakage points must also be checked.
- Burning or sharp smell: A smell of burning oil may indicate that leaking oil is reaching hot surfaces, such as the exhaust manifold.
How Is the Fault Diagnosed?
These symptoms do not necessarily mean that the seal or connection has failed. Diagnosis involves the following checks, using the vehicle’s service procedure:
- Visual inspection: With the vehicle safely supported on suitable lifting equipment, inspect the sump and sensor area for oil traces, seal damage and loose connections.
- Cleaning and observation: Clean and dry the suspect area, then check where fresh leakage appears under the conditions specified for the vehicle.
- Electronic diagnosis: Read available fault codes with suitable diagnostic equipment. The information may help identify a sensor signal problem.
- Electrical and signal checks: Measure the specified electrical values using the appropriate equipment and procedure, and check the integrity of the connection.
- Leak testing: Where necessary, a specialist workshop can carry out the applicable leak test. Use only a test method specified for the system.
Causes of Seal and Connection Faults
Possible causes of problems in this area include:
- Ageing and wear: Elastomer seals can harden, crack or lose flexibility over time.
- High temperature: Heat exposure can contribute to degradation of the sealing material.
- Chemical exposure: Oil condition and incompatible substances can affect seal material.
- Incorrect installation: A wrongly positioned sensor or seal may leak or fail prematurely.
- Overtightening: Excessive tightening can crush the seal or damage the housing.
- Vibration and mechanical stress: These can contribute to loose or damaged connections.
- Unsuitable parts: A seal that does not meet the application’s requirements may deform or deteriorate.
Choosing Original and Aftermarket Parts
Original and aftermarket options may be available for sump level sensor seals and connections. Both require attention to the specific application and documented product requirements.
Original Equipment Parts
Original service parts are supplied through the vehicle manufacturer’s parts system. Check the applicable part reference and vehicle details rather than assuming that every visually similar part fits. Warranty requirements must be checked in the relevant terms.
Aftermarket Parts
Aftermarket parts are alternatives supplied by third-party manufacturers. Their suitability depends on the product’s documented application and specifications. Assess the supplier, product information and any relevant certification; a general quality claim is not proof of compatibility or equivalent performance.
Comparison Table
| Feature | Original equipment part | Aftermarket part |
|---|---|---|
| Quality assurance | Check the manufacturer’s product and warranty documentation. | Check the individual manufacturer’s documentation and applicable certification. |
| Price | Obtain a current quotation. | Compare a current quotation for the verified application. |
| Availability | Confirm through the relevant supply channel. | Confirm with the supplier for the exact reference. |
| Compatibility | Verify against the vehicle and current part reference. | Verify the documented cross-reference and vehicle application. |
| Warranty coverage | Check the applicable warranty terms. | Check the applicable terms; do not assume coverage from the part category alone. |
Correct Part Selection and Verification
The most important point when choosing the seal and fasteners is compatibility with the vehicle. Incorrect selection can cause installation problems, recurring faults and additional cost or downtime.
Information Needed for Verification
- OEM reference or part number: Use the existing reference as a starting point and verify the current replacement or documented cross-reference.
- Vehicle identification number: The VIN helps identify production specifications and equipment differences. Vehicles from the same model year may use different parts.
- Engine code: Different engine variants within one vehicle model may require different sensors and seals.
- Production date: This helps identify production changes and updated components that apply before or after a particular build date.
- Model and equipment level: The model, variant and equipment package may also affect selection.
Provide this information to the supplier and verify compatibility before ordering.
Installation and Replacement
Access to the sump level sensor and its seal varies by vehicle. Some installations are readily accessible, while others require additional components to be removed.
Pre-Replacement Checklist
- Verify the replacement seal and fasteners using the part reference and VIN.
- Prepare the required tools, including the specified torque wrench and sockets.
- Check the oil level and prepare any oil required by the replacement procedure.
- Keep the work area clean and safe.
- Allow the vehicle to cool as required by the service instructions.
- Use appropriate gloves and eye protection.
- Check that the vehicle lifting and support equipment is safe and suitable.
- Obtain the tightening values from the service manual.
General Replacement Stages
The following is an overview. Follow the vehicle-specific service manual, including its oil handling and electrical isolation requirements:
- Preparation: Park on level ground, secure the vehicle and allow the engine to cool as required.
- Access: Raise and support the vehicle safely. Remove underbody protection or other components where the specified access procedure requires it.
- Electrical disconnection: Follow the vehicle’s isolation instructions before carefully disconnecting the sensor connector.
- Removing the sensor and old seal: Clean the surrounding area before releasing the fasteners. Follow the specified oil handling procedure and remove the sensor carefully.
- Surface cleaning: Remove old seal residue, oil and dirt from the mounting seat without damaging it. Check that the surface is sound.
- Installing the new seal: Position it correctly, making sure it is fully seated without twisting or crushing.
- Sensor installation: Position the sensor and start the fasteners by hand. Tighten them using the specified sequence and torque.
- Electrical connection: Check the connector and reconnect it, making sure the locking mechanism engages.
- Final checks: Check the connections, refit removed components and restore the oil level as specified.
- Testing: Perform the prescribed checks for dashboard warnings and leakage after installation.
Maintenance and Preventive Measures
The following measures help maintain the seal and its connections:
- Change the engine oil and filter in accordance with the vehicle’s maintenance requirements.
- Have the sensor area inspected during servicing.
- Use verified original or suitable aftermarket parts.
- Follow the manufacturer’s tightening specifications during installation.
- Keep the sensor area clean when changing the oil.
- Avoid directing high-pressure washing at the sensor and its electrical connections.
Reliable Parts Sourcing
Choose a supplier that can confirm the application of the sump level sensor seal and connection components. Provide the VIN, engine code and relevant part reference so that the proposed part can be checked before ordering.
Frequently Asked Questions
How often should the sump level sensor seal be replaced?
There is no single replacement interval covering every application. Replacement may be needed when leakage is diagnosed or when the sensor is removed. Follow the relevant instructions on seal renewal during sensor replacement.
Can a faulty seal cause engine damage?
The seal fault itself may not directly damage the engine, but leakage can reduce the oil level. Operating with insufficient oil can cause serious engine damage.
Does an aftermarket seal affect the vehicle warranty?
Check the applicable warranty conditions and the product’s documented specifications. Do not assume a particular warranty outcome solely because a seal is described as certified or aftermarket.
Can I replace the seal myself?
The job requires suitable tools, safe access and the relevant service instructions. Incorrect installation can cause leakage or sensor faults. If you cannot meet these requirements, use a qualified workshop.
How should the sensor connector be cleaned?
Use only a connector cleaning method and product approved for the application. Inspect the disconnected connector carefully and avoid damaging its pins or seals.
Does the seal material matter?
Yes. The specified material must suit engine oil, operating temperature and the application’s chemical exposure. An unsuitable material can deteriorate prematurely.
Conclusion
The sump level sensor seal and connections support correct operation of the engine oil system. Faults can lead to leakage, incorrect readings and, where oil is lost, a risk of engine damage. Recognising symptoms and obtaining an accurate diagnosis helps prevent continued operation with an unresolved fault.
Verify parts using the OEM reference, VIN, engine code and production date. Check documented compatibility and quality information for both original and aftermarket options.
Follow the manufacturer’s installation procedure and tightening specifications. Routine servicing and inspection help identify deteriorating seals or connections.
A reliable supplier and appropriate technical support can help establish the correct part and installation requirements for the vehicle.