
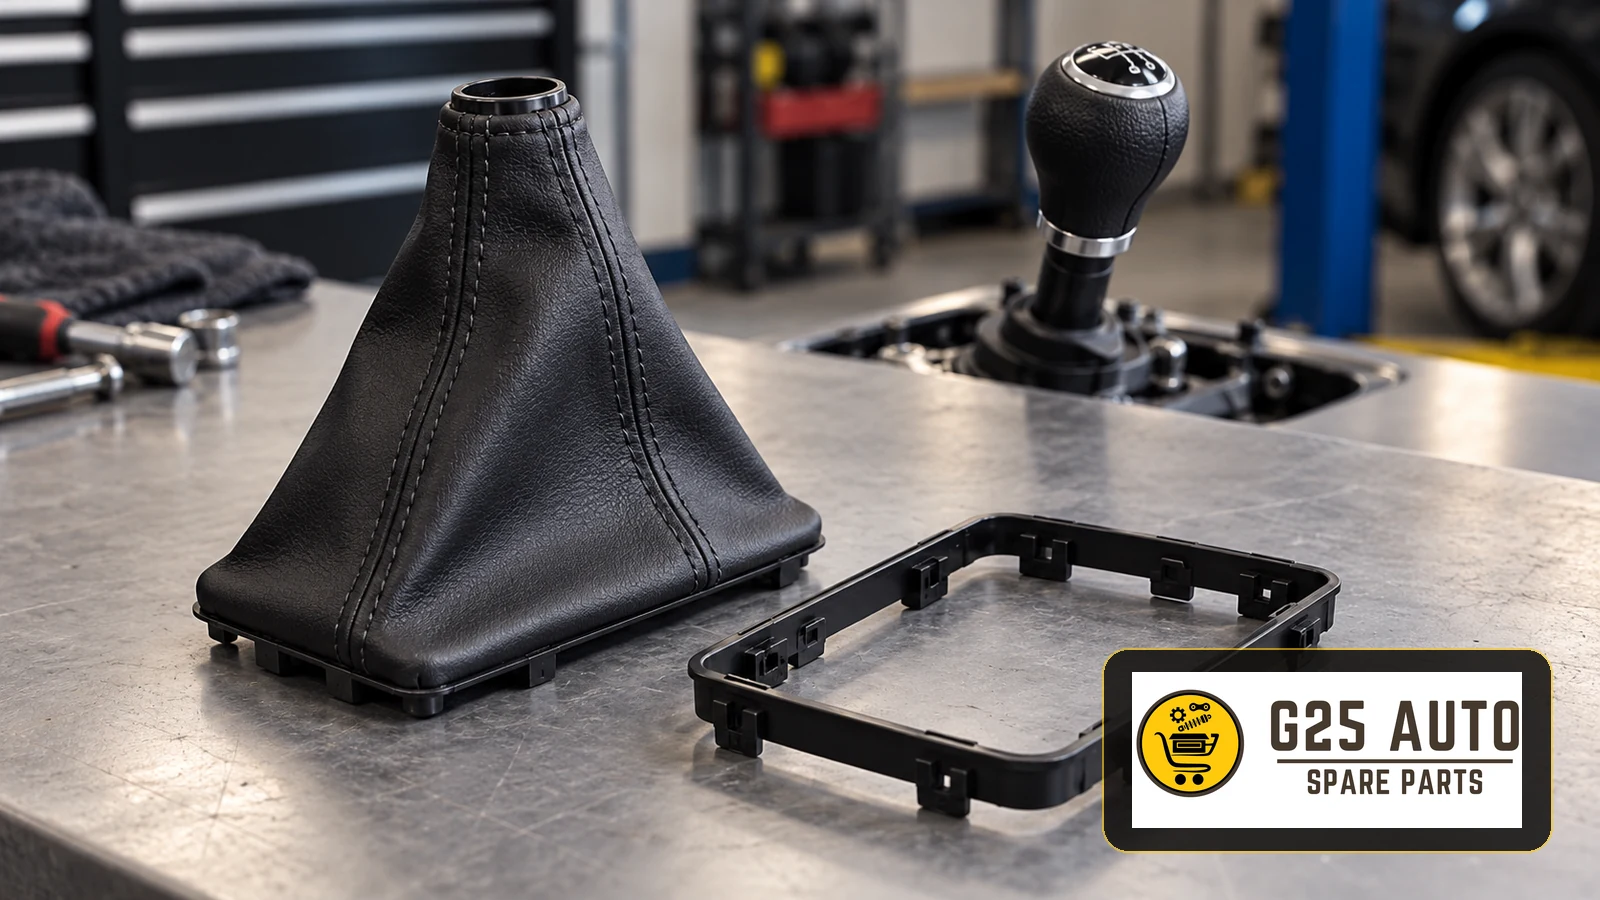
The manual gearshift gaiter and retaining frame help protect the area around the gear lever and give the interior a tidy appearance. The gaiter covers the lever opening, while the frame holds its lower edge in position. Their contribution to protection depends on the vehicle’s design; neither part guarantees the life of the gearshift mechanism.
What Are the Gearshift Gaiter and Retaining Frame?
The gearshift gaiter is a flexible cover around the base of the lever. Depending on the design, it may use rubber, silicone or thermoplastic material. It sits where the lever emerges through the console and folds or flexes as the lever moves.
The retaining frame is a plastic or metal structure securing the gaiter to the centre console or lever base. Its attachment arrangement varies; clips or screws may be used. A damaged frame can leave the gaiter loose and prevent it from sitting correctly.
Fault Symptoms: When Is Replacement Needed?
Problems with the gaiter and retaining frame often produce visible signs. Recognising them helps identify damage before it becomes more extensive:
Visible Signs
- Tears, cracks or punctures in the gaiter
- Wear or peeling around its edges
- A broken or cracked retaining frame
- A gaiter that moves out of position or feels loose
- Discolouration or hardening of the material
- Broken or missing frame clips
Functional Signs
- Dust and dirt collecting around the gear lever
- Water appearing near the opening, including after washing; its source needs investigation
- Squeaking from the lever base
- The gaiter pulling free as the lever moves
- A draught around the console, where the assembly provides part of the seal
Inspection Steps for Diagnosis
If symptoms appear, a professional inspection can establish their cause. The following checks help assess the gaiter and frame without treating every symptom as proof of a failed cover:
Inspection Checklist
- Examine the outer surface and edges carefully
- Use a torch to look for holes in accessible areas
- Check retention gently without pulling hard on the gaiter
- Check that the frame clips are fully seated
- With the vehicle safely secured and engine off, observe the gaiter’s movement through the available gear positions
- Check the flexibility of the material
- Look closely for broken or cracked areas of the frame
- Check for oil or grease around the lever base and investigate its origin separately
Original Equipment and Aftermarket Parts Compared
Both original equipment and aftermarket replacement gaiters and frames may be available. Compare the specific products rather than assuming identical fit, quality or commercial terms:
| Feature | Original Equipment Part | Aftermarket Part |
|---|---|---|
| Compatibility | Check the correct vehicle application and variant | Check the manufacturer’s listed application and attachment details |
| Material quality | Check the specified material and finish | Material and finish vary between products |
| Availability | Confirm current availability with the supplier | Confirm current availability with the supplier |
| Cost | Request a current quotation | Compare a current quotation for the required assembly |
| Warranty | Check the applicable written terms | Check the applicable written terms |
| Colour and texture | Check the required interior trim version | Check for differences from the existing trim |
When choosing an aftermarket part, use a reliable supplier and examine product-specific quality information. Quality can vary, so the product needs assessment on its own merits.
How to Choose the Correct Part
The central task is to identify a gaiter and frame that suit the vehicle’s actual lever and console arrangement. The following information supports that check:
Checking an Original Part Reference
Look for a readable reference on the existing gaiter or retaining frame, if present. It can support a catalogue comparison, but a number alone does not guarantee compatibility. References may be absent or unreadable on worn components.
Checking the Vehicle Identification Number
The VIN can help a service centre or parts supplier identify the vehicle’s specification through the relevant catalogue. This is useful where trim levels use different parts, although the actual assembly and catalogue application still need checking.
Engine Code and Production Date
Lever arrangements can differ between versions and production periods of the same model. Engine code and production date provide additional identification information, particularly around model updates and changes between generations.
Physical Dimensions and Features
Compare the existing gaiter’s height, diameter, folds and material. Check the retaining frame’s clip type, screw-hole positions and mounting arrangement as well. These comparisons support identification rather than replacing the application check.
Replacement and Installation
The complexity of replacing a gaiter and frame depends on the vehicle. Incorrect removal or installation can damage the trim or affect the cover’s movement, so follow the instructions for the particular assembly.
Materials and Tools
- A correctly identified replacement gaiter
- A replacement retaining frame, if required
- Flat and cross-head screwdrivers, where specified
- A suitable plastic trim-removal tool
- A cleaning cloth and a surface cleaner compatible with the trim material
Outline of the Installation Process
The procedure varies by model. Broadly, remove the old gaiter and frame carefully, clean the accessible lever-base area, position the replacement frame correctly and attach the gaiter as specified. Check the relevant clips and screws without overtightening. Once fitted, check that the gaiter remains seated and does not restrict lever movement through the gear positions, with the vehicle safely secured and engine off.
Points to Check When Choosing an Aftermarket Part
Consider the manufacturer’s identity, the listed application and relevant product documentation. A generic certificate or marking alone does not establish that a gaiter meets the requirements of a particular vehicle.
UV resistance, temperature tolerance and flexibility matter when assessing the material. Silicone and thermoplastic products should be compared using their actual specifications; neither material guarantees a longer life than rubber in every application. Appearance also matters for interior trim.
The frame needs suitable resistance to breakage and secure, correctly positioned clips. Poorly made or mismatched clips can break during installation or fail to retain the gaiter properly.
Care and Service-Life Tips
Simple care can help preserve the gaiter’s condition:
- Clean it periodically with a soft cloth
- Avoid harsh chemicals and abrasive products
- Reduce prolonged exposure to direct sunlight where practicable
- Use a protective treatment only if the material manufacturer permits it; do not assume silicone sprays suit every cover
- Avoid applying excessive force when shifting gear
- Check regularly that the retaining frame remains secure
Frequently Asked Questions
How Often Should the Gaiter Be Replaced?
Replacement depends on condition. Use, material and exposure affect wear, so a universal lifespan cannot be assumed. Inspect it regularly and replace it when damage or loss of retention makes replacement necessary.
Should I Replace Only the Gaiter or the Frame as Well?
The frame may be reusable if it has no cracks, breaks or damaged clips and is compatible with the new cover. Replace a damaged frame as required by the assembly design. Check what the replacement kit actually contains.
Can I Use a Different Colour or Material?
A different colour or material may be suitable if the replacement meets the assembly’s fit and movement requirements. Check how it matches the interior. Leather or carbon-look finishes are appearance choices and do not themselves demonstrate compatibility.
Does Replacement Affect the Vehicle Warranty?
The effect depends on the applicable warranty terms and the work performed. Consult the warranty provider or authorised service centre before drawing conclusions about a particular replacement.
Can the Vehicle Be Used With a Torn Gaiter?
A tear should be assessed promptly. Its effect depends on which cover is damaged and how the mechanism is protected underneath. Do not assume that a torn interior gaiter proves internal damage or establishes that continued use is safe.
Common Mistakes and How to Avoid Them
Common errors during gaiter replacement include:
- Ordering the wrong part: Incomplete vehicle information can lead to a mismatch. Cross-check the VIN or original reference with the catalogue and the actual assembly.
- Forcing installation: Forcing a poorly fitting gaiter can damage it or the console. Recheck compatibility if the part needs excessive force.
- Leaving clips unseated: Check every attachment before finishing; incomplete engagement can allow the gaiter to work loose.
- Installing without cleaning: Clean the accessible lever-base area before fitting the replacement to avoid trapping dirt.
- Choosing poor quality: Assess material, finish and retention rather than relying on price alone. Poorly made covers can deform, fade or tear.
Material Types and Characteristics
Gaiters come in several materials. Their properties depend on the particular formulation and construction:
Rubber Gaiters
Rubber can provide a flexible, durable cover. Exposure to heat and sunlight can contribute to hardening over time. Check the product specification rather than assuming all rubber gaiters behave alike.
Silicone Gaiters
Silicone products may offer useful temperature resistance and flexibility. Their ageing behaviour, suitability and cost depend on the specific product; they should not be assumed superior to every rubber alternative.
Thermoplastic Gaiters
Thermoplastic covers can be lightweight and available in different colours. Flexibility, shape retention and durability depend on the material and design of the particular gaiter.
Leather-Covered Gaiters
Leather finishes are often chosen for their appearance. Construction varies and may include an underlying support or cover. Check the actual product rather than assuming a particular internal material.
Conclusions and Recommendations
The manual gearshift gaiter and retaining frame help maintain the appearance and condition of the lever area. Replacing damaged parts can restore the cover’s seating and movement; the extent of protection depends on the assembly.
Compare original and aftermarket options using their documented application, material and attachment details. Neither the original label nor an aftermarket description alone guarantees fit or equivalent performance. Use the vehicle information and existing part details together.
Work with reliable suppliers, review relevant product documentation and follow the applicable installation instructions. Regular inspection helps identify wear or loose retention before further deterioration.
Even a relatively simple trim component needs careful selection and fitting. A correctly seated gaiter can help keep the lever area tidy and comfortable to use.