
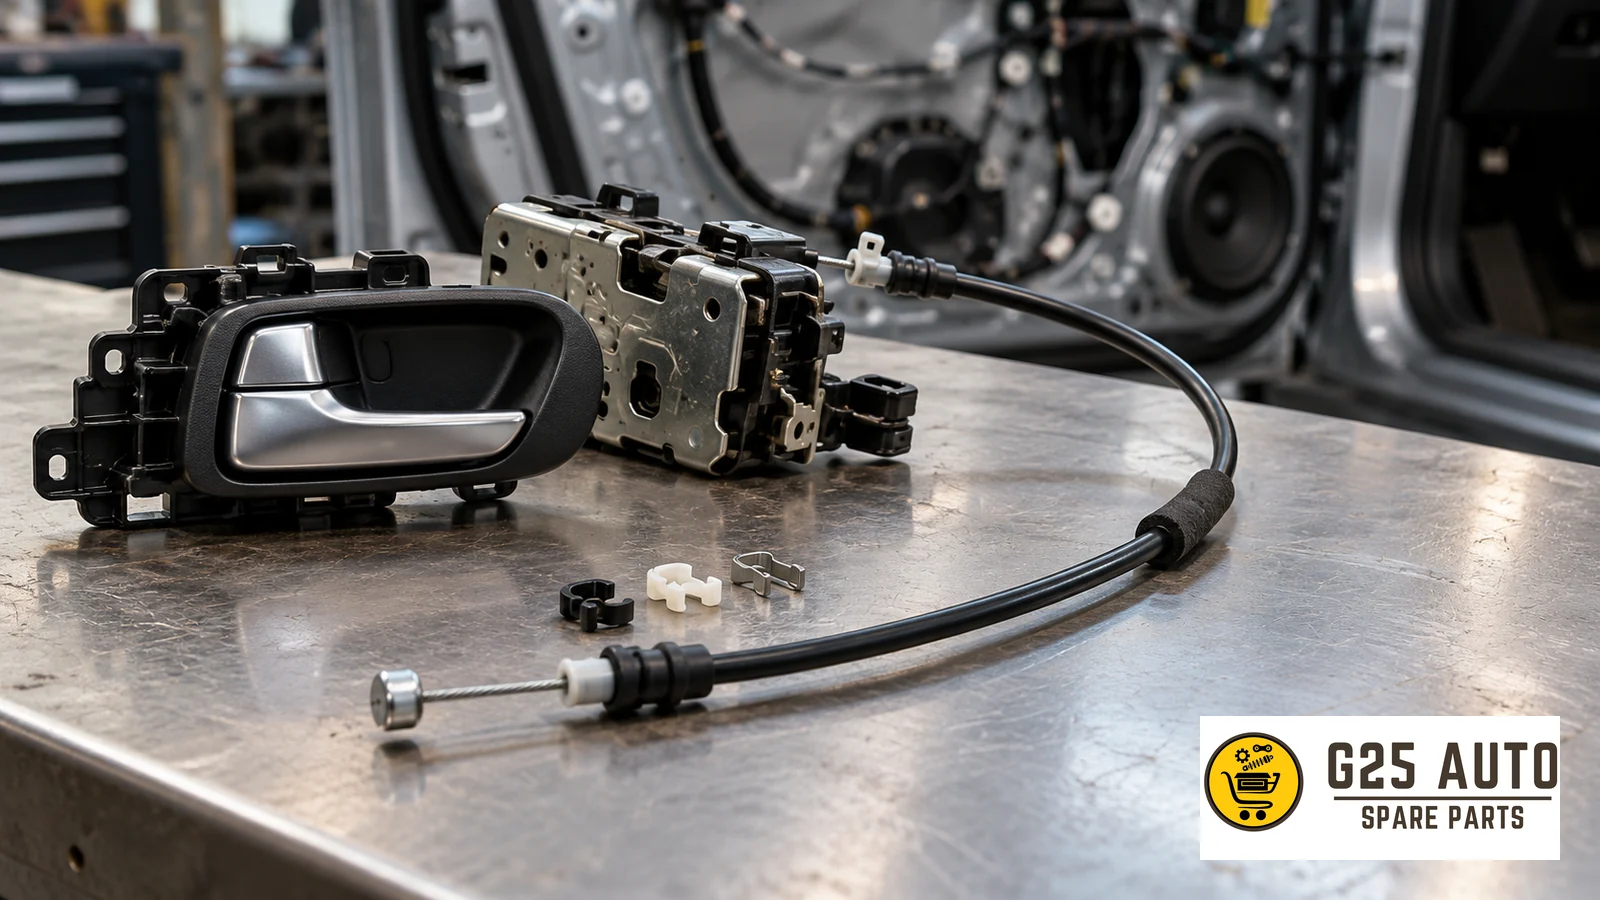
What You Need to Know About Interior Door Release Cables and Retaining Clips
The interior door release cable and its retaining clips form an important connection between a vehicle’s door handle and latch mechanism. Damage to these components can prevent the door from opening from inside or, depending on the affected linkage, outside. Start by identifying the fault, then select the replacement using the relevant OEM or part reference, VIN and production date to check fitment.
What Are Door Release Cables and Retaining Clips?
The door release linkage runs from the handle to the latch mechanism. Depending on the design, it may use a metal rod or a sheathed cable. A retaining clip is a plastic or metal fastener that keeps the linkage or cable housing in its intended position and secures its connection.
A door mechanism may contain several linkages and clips. The interior handle, exterior handle and locking mechanism can have separate connections, depending on the vehicle. Correct seating of each clip is essential to the operation of its associated linkage.
How the System Works
Pulling the handle transmits mechanical movement through the linkage to the latch. When the latch releases, the door can open. The retaining clip helps keep the connection secure and correctly positioned.
Clips can also support and guide the linkage at designated points inside the door. Correct routing helps it move without unwanted rubbing or interference.
Fault Symptoms
A problem with a door release cable or retaining clip may produce the following symptoms:
- The door does not open when the handle is pulled, or releases only after a delay.
- The handle moves freely with little or no resistance.
- The door opens only from inside or only from outside.
- Clicking or rattling is heard inside the door when the handle is pulled.
- The central locking system unlocks the door, but the handle does not release it.
- Loose plastic components rattle behind the door trim.
- The door catches or becomes stuck while partly open.
These symptoms do not establish a cable or clip fault on their own. A defective latch, broken handle or hinge problem can cause similar difficulties.
How to Diagnose the Fault
Diagnosis may require removal of the door trim panel so that the internal mechanism can be inspected:
Visual Inspection
With the panel removed according to the vehicle’s service procedure, inspect the linkage connections. Look for broken, disconnected or loose cables or rods, along with damaged or missing clips.
Manual Function Test
Carefully operate the accessible linkage as described in the service procedure to check the latch response. If the connection is intact but the latch still fails to operate, investigate the mechanism further.
Clip Inspection
Check that each clip is fully seated. A displaced or broken clip can leave the linkage operating at the wrong angle or allow its housing to move.
Comparing Genuine and Aftermarket Parts
| Feature | Genuine Part | Aftermarket Part |
|---|---|---|
| Fitment | Vehicle manufacturer’s reference; confirm the correct application. | Check the stated cross-reference and physical fitment. |
| Supply Time | Confirm availability and lead time with the supplier. | Confirm availability and lead time with the supplier. |
| Warranty | Check the applicable manufacturer’s or seller’s terms. | Check the applicable supplier’s terms. |
| Quality | Specified for the relevant original application. | Depends on the product and manufacturer; assess supporting information. |
| Availability | Check authorised and other appropriate supply channels. | Check the relevant parts distributors. |
A Balanced Assessment
Genuine parts are supplied for the vehicle manufacturer’s applications. If the vehicle is under warranty, check the relevant terms before choosing a replacement. A suitable aftermarket part may also be a practical option, provided its quality and fitment are verified.
When selecting an aftermarket component, review the manufacturer’s references, any applicable quality documentation and the actual application. Poorly made or unsuitable parts may lead to repeat failures; a low price alone does not establish quality.
Why Part References and Fitment Checks Matter
Identifying the correct part reference is a key step when choosing a door release cable or retaining clip. Vehicles within the same model range may use different components according to production date, equipment and vehicle variant.
What Is an OEM or Part Reference?
An OEM reference identifies a component in the relevant original equipment parts catalogue. A reference may be marked on the part or packaging, but it should be checked against the vehicle application rather than treated as proof of fitment by itself.
Use the VIN and production information when checking the correct reference. A service department or parts supplier can use these details to consult the appropriate vehicle parts catalogue.
VIN and Production Date
The vehicle identification number, or VIN, identifies the vehicle and supports a more precise catalogue lookup. Confirm any relevant equipment details where the catalogue requires them.
The production date matters because manufacturers can revise components during a model year. Vehicles registered in the same year may therefore have different clip or linkage arrangements.
The Effect of Vehicle Variant and Equipment
Door equipment can vary between vehicle versions. Features such as powered locks or soft-close systems may require different linkage and clip arrangements, so check the actual door specification rather than assuming a common part across the range.
Installation and Replacement
Required Materials
- The correct replacement interior release cable and retaining clips.
- Suitable screwdrivers, including cross-head and flat-head types where required.
- Trim removal tools, such as a plastic trim lever.
- Work gloves.
- Adequate lighting.
Checklist
Before and after fitting, check the following:
- ☐ Has the correct part reference and vehicle application been verified?
- ☐ Are all required new clips present and undamaged?
- ☐ Have the door trim removal instructions been reviewed?
- ☐ Have the original linkage connections been photographed?
- ☐ Are all clips fitted in the correct positions?
- ☐ Is the linkage routed and adjusted correctly, without excessive tension?
- ☐ Has the handle been tested through its normal operating travel?
- ☐ Are the trim panel clips fully seated?
- ☐ Have the door seals and insulation been restored?
Installation Steps
1. Safety: Switch off the ignition and apply the parking brake. Follow the vehicle’s service precautions for work inside the door.
2. Panel Removal: Carefully release the trim panel screws and clips. Avoid damage to the electric window and mirror wiring.
3. Removing the Old Part: Carefully remove the broken or displaced cable and clips without damaging the latch mechanism.
4. Fitting the Replacement: Connect the new cable to the latch and handle in the order specified for the vehicle. Install the clips so that the linkage is retained and routed correctly.
5. Testing: Before refitting the panel, check the release operation from inside and outside as prescribed by the service procedure. Confirm correct opening and closing before completing the repair.
6. Refitting the Panel: Once the connections operate correctly, refit the trim panel with its clips and screws.
Common Problems and Solutions
The Clip Keeps Coming Loose
The clip may be the wrong type, or its mounting point may be damaged. Check both the specified replacement clip and the condition of the mounting point.
The Cable Breaks Again Soon After Replacement
The latch may be binding, or the door may have dropped out of alignment. Check that the mechanism moves freely and address any hinge or alignment fault before fitting another cable.
The Noise Persists
The linkage may be rubbing against a clip or the latch mechanism. Check routing and contact points; use lubricant only at the locations and of the type specified for the mechanism.
Parts Enquiries for European and Balkan B2B Buyers
Finding the correct door release cable or retaining clip can require a detailed application check. For a G25Auto B2B enquiry, identify the component and the vehicle application clearly.
Provide the make, model, production year and relevant vehicle variant details. If the reference is uncertain, include the VIN and ask for the application to be checked before ordering.
Compare the relevant replacement options using the confirmed reference and connection details, and request any supply information needed for your business.
Frequently Asked Questions
How Can the Door Be Opened if the Interior Release Cable Breaks?
Access to the mechanism depends on the vehicle and whether the door is closed. Seek professional assistance and follow the vehicle-specific repair procedure rather than forcing the trim or reaching blindly into the door.
Can the Same Clips Be Used on Different Vehicles?
Some clips may be listed for several applications, but similarity does not confirm fitment. Use the specified clip and verify its connection and retaining features for the vehicle.
Can I Replace the Cable Myself?
The job requires suitable tools and familiarity with door trim removal. Incorrect fitting can leave the door unable to open, so seek professional help if the procedure is unclear.
How Often Should These Parts Be Replaced?
Replacement is generally based on condition and symptoms rather than an assumed universal interval. Follow any applicable vehicle service guidance and investigate signs of malfunction.
Should Only the Clip Be Replaced, or the Cable Too?
This depends on the damage and whether the parts are supplied separately. A broken clip may be replaced on its own if the cable and mountings remain serviceable; a broken or stretched cable needs replacement. Check the contents of the replacement kit.
Conclusion
The interior door release cable and retaining clips are largely hidden but important connections. Prompt diagnosis and correct part selection help resolve faults when symptoms appear.
Checking the part reference, VIN and production date reduces the risk of ordering the wrong component. Compare genuine and aftermarket options according to verified quality, applicable warranty terms and purchasing requirements. Correct fitment matters in either case.
Installation requires care. If there is uncertainty, professional support can help avoid additional damage and wasted time. A suitable component, correctly installed and tested, supports reliable operation of the door release system.