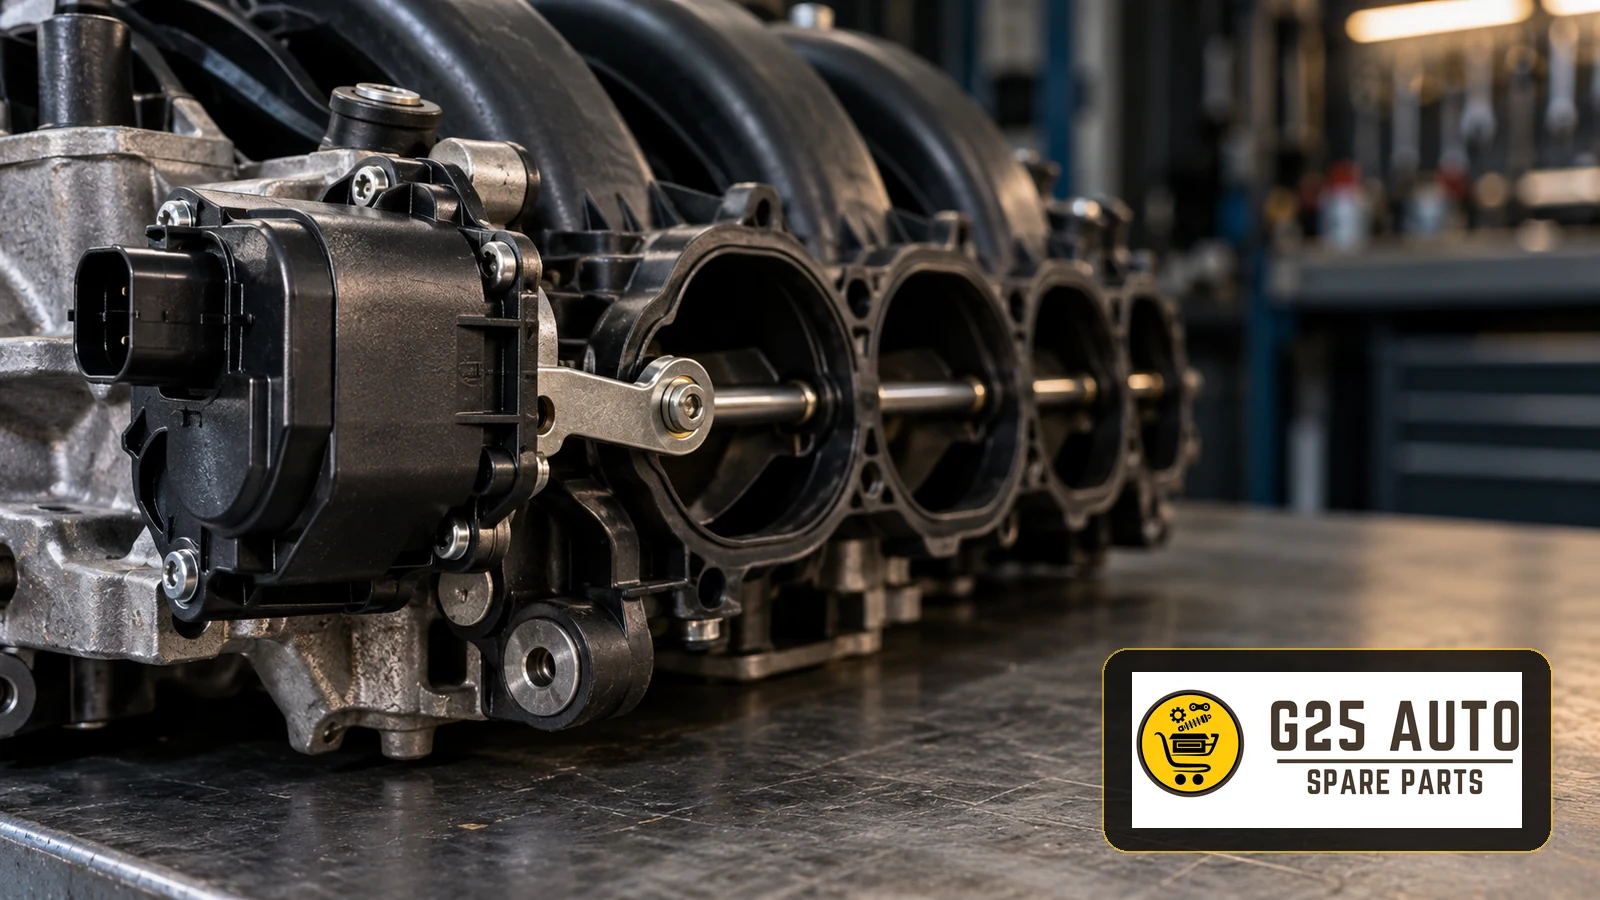
An intake manifold flap motor is an electric actuator controlling flaps inside the intake manifold. Following engine management commands, it adjusts airflow to support performance, fuel economy and emissions control. Faults may cause an engine warning light, uneven idle or reduced performance.
What Is an Intake Manifold Flap Motor and How Does It Work?
Electronic control systems help manage engine efficiency. Flap actuators are used in some variable intake manifold systems to regulate airflow according to operating conditions.
Depending on design, changing intake path length can support low-speed torque and higher-speed power. The engine control unit (ECU) commands the actuator to move the manifold flaps.
Operating Principle
Actuator designs may use stepper or DC motors. The ECU evaluates engine speed, load, air temperature and other sensor inputs to determine flap position. Mechanical linkages transfer actuator movement to the flaps.
Flap numbers and arrangements vary between engines; their positions change with operating requirements.
Intake Manifold Flap Motor Fault Symptoms
Several symptoms may accompany actuator problems. Correct interpretation helps identify faults promptly.
Common Symptoms
- Engine warning light: The ECU may store a fault code and illuminate the warning light.
- Uneven idle: Shaking, fluctuating speed or stalling may occur.
- Power loss: Performance may drop within particular engine speed ranges.
- Increased fuel consumption: Airflow problems may affect combustion efficiency.
- Rough running: Engine vibration may increase.
- Delayed throttle response: Acceleration may feel hesitant.
- Unusual noises: Clicking or rattling may come from the manifold area.
How Is the Fault Diagnosed?
These symptoms have multiple possible causes. Professional diagnosis should establish the fault before replacement.
Diagnostic Steps
- Read fault codes: Use an OBD diagnostic tool and interpret codes using application-specific information.
- Visual inspection: Examine the actuator, wiring and connectors for damage.
- Electrical testing: Check supply voltage and ground against the specified procedure.
- Mechanical inspection: Check for binding or damage using the approved method.
- Live data: Where supported, compare commanded and reported flap positions.
Checklist Before Purchasing
When replacement is necessary, collect the following information.
Pre-purchase Checklist
- Record the vehicle identification number (VIN).
- Identify the engine code from available vehicle information.
- Establish the production year and month.
- Check the existing original equipment part reference.
- Photograph component markings and numbers.
- Send identification details to the supplier for application checks.
- Ask whether seals, fasteners or other installation parts are required.
- Check warranty and return terms.
- Confirm whether the offer covers original or aftermarket parts.
- Clarify return and exchange procedures.
Original and Aftermarket Parts Compared
Both options require application and supplier checks. Brand category alone does not establish suitability.
| Factor | Original Part | Aftermarket Part |
|---|---|---|
| Compatibility | Verify the vehicle-specific reference. | Verify the documented application. |
| Quality | Review product specifications. | Review manufacturer specifications. |
| Price | Obtain a current quotation. | Compare equivalent quotations. |
| Warranty | Confirm applicable written terms. | Confirm supplier or brand terms. |
| Availability | Check with the supplier. | Check with the supplier. |
| Service life | Depends on application and conditions. | Depends on product and conditions. |
Why the Original Equipment Reference Matters
Incorrect actuator selection can cause unnecessary expense and operating problems. Identify the applicable part reference carefully.
Why Is This Reference Important?
Vehicles sharing a model name can use different manifolds according to engine, equipment and production date. A reference supports identification but still requires application verification.
Where Can the Reference Be Found?
- Existing component: Inspect labels or moulded markings.
- Vehicle documentation: Check any available parts information.
- Authorised service: Request a vehicle-specific lookup.
- Online catalogues: Use supported VIN or engine-code searches.
The Role of VIN Verification
The VIN identifies the vehicle and supports catalogue searches. Available build information depends on the manufacturer and lookup system.
What Information May a VIN Lookup Provide?
- Production year and month.
- Engine type and code.
- Transmission type.
- Factory equipment.
- Regional market specification.
- Relevant revisions or updates.
European and Balkan B2B suppliers can use these details alongside component references to assess the application.
Checking Engine Code and Production Date
Engine codes help distinguish versions with different outputs and intake systems within the same vehicle model.
How Can You Find the Engine Code?
Look in vehicle documentation or at engine markings; locations and code formats vary.
Production date matters because component designs can change during a model year.
Selecting an Aftermarket Part
Cost and availability may influence sourcing, alongside the following criteria.
Selection Criteria
- Brand reliability: Review the manufacturer’s reputation and references.
- Documentation: Assess relevant quality documentation.
- Technical specifications: Check electrical and mechanical requirements.
- Warranty: Examine the written terms.
- Materials: Assess housing and electronic component quality.
- Compatibility: Request documented application confirmation.
Installation and Adaptation
Access and procedures vary. Replacement may require professional workshop equipment and expertise.
General Installation Steps
- Follow the specified battery isolation procedure.
- Remove covers and intake hoses as required.
- Disconnect the actuator connector carefully.
- Remove fasteners and the old actuator.
- Inspect the manifold and flap mechanism; clean only as specified.
- Install the replacement and check connections.
- Reassemble and restore power following the procedure.
- Recheck faults and perform adaptation where specified.
Why May Adaptation Be Necessary?
Some systems require diagnostic learning of actuator reference positions. Omitting required adaptation may cause poor operation or fault codes.
Maintenance and Prevention
Follow the vehicle’s maintenance requirements to support reliable intake system operation.
Preventive Maintenance
- Air filter: Replace according to the maintenance schedule.
- Fuel: Use the specified fuel quality.
- Cleaning: Address manifold deposits when diagnosis and procedures call for it.
- Electrical system: Inspect loose connections and damaged wiring.
- Fault monitoring: Investigate recorded faults promptly.
Frequently Asked Questions
Does a Flap Motor Fault Make Driving Dangerous?
Risk depends on symptoms and diagnosis. Performance loss needs professional assessment.
Can I Drive with a Faulty Actuator?
Obtain workshop advice based on the fault; distance alone does not establish safe operation.
Must the Entire Manifold Be Replaced?
Separate actuator replacement may be possible. Mechanical damage and assembly design determine the repair.
Is Adaptation Required after Aftermarket Replacement?
Follow the vehicle-specific procedure; learning requirements vary between systems.
How Long Should the Warranty Be?
Check the actual manufacturer’s or supplier’s terms rather than assuming a standard duration.
What Matters When Ordering Online?
Provide VIN, engine code and production details. Confirm return terms and supplier reliability.
Conclusions and Recommendations
Flap actuators support intake management. Diagnose performance problems before deciding on replacement.
Cross-check VIN, engine code, part reference and production date. Model name alone is insufficient.
Compare original and aftermarket offers by application, specifications, commercial terms and supplier reliability.
Complete required adaptation and system checks after installation. Professional support helps establish the correct repair.
Careful identification and dependable sourcing help avoid unsuitable orders and unnecessary expense.