
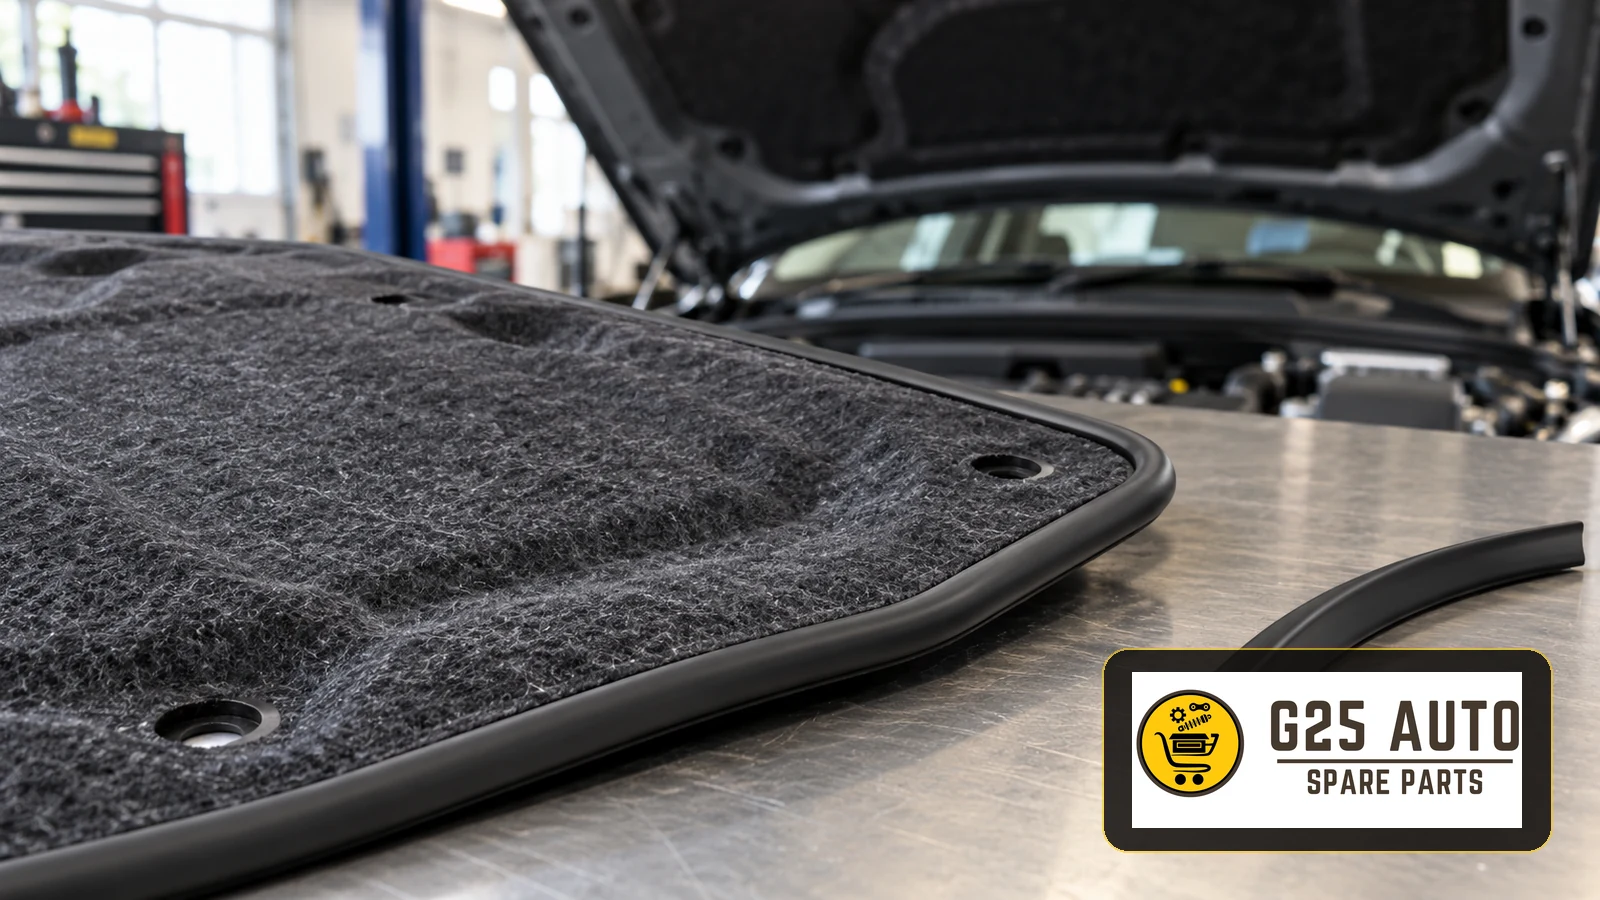
Bonnet insulation edge trim is a plastic or rubber-based profile used, where specified, to retain and finish the edges of the insulation beneath the bonnet. Choosing the correct profile helps protect the liner’s edges and maintain its position so that the insulation can perform its intended role.
What Is Bonnet Insulation Edge Trim?
The sound and heat insulation beneath a vehicle’s bonnet commonly takes the form of a foam or felt panel. Specially shaped plastic or flexible rubber profiles may be used to finish its edges and support its attachment to the bonnet panel. This profile is known as bonnet insulation edge trim.
The trim protects exposed liner edges from deterioration, provides a tidy finish and helps prevent movement where it forms part of the specified retaining arrangement. Depending on the design, it may also close gaps and provide an additional barrier against water, dust and airflow. Do not assume that every edge trim forms a watertight seal.
Functions and Importance of the Edge Trim
The trim’s functions depend on the vehicle’s insulation arrangement and can include:
- Secure mounting: Helping retain the insulation in its specified position beneath the bonnet.
- Edge protection: Reducing fraying and deterioration at the liner’s edges.
- Appearance: Giving the underside of the bonnet a tidy finish.
- Sealing: Helping limit contamination where the profile is designed to provide a barrier.
- Vibration cushioning: Providing cushioning where this is part of its specified function.
- Noise insulation: Helping keep the liner positioned to perform its intended acoustic role.
Fault Symptoms and Inspection
Problems with bonnet insulation edge trim are often visible during inspection:
Common Signs of Deterioration
- Cracked or broken trim.
- Discolouration or hardening associated with environmental and heat exposure.
- Insulation separating from the trim or becoming loose.
- Fraying at the edges of the insulation panel.
- Increased engine noise from beneath the bonnet, which may also have other causes.
- A sagging insulation panel.
- Visible deformation of the trim.
Checks to Help Identify the Problem
Use the following checks to assess the condition and attachment:
- Open the bonnet and inspect the insulation panel’s overall condition.
- Check the trim’s retention gently by hand without pulling hard enough to damage the liner.
- Look along the trim for cracks, breaks or missing sections.
- Inspect the points where the insulation meets the trim.
- Check for contact or rubbing between the trim and the bonnet closing mechanism.
If these checks reveal damage or poor retention, investigate whether the trim needs replacement and whether the liner itself is still serviceable.
Original and Aftermarket Edge Trim Compared
| Feature | Original Part | Aftermarket Part |
|---|---|---|
| Price | Request a current quotation. | Compare current quotations for suitable products. |
| Compatibility | Confirm the specified vehicle application. | Verify the application and relevant cross-reference. |
| Material quality | Check the specified product requirements. | Check documented specifications for the particular product. |
| Supply time | Confirm availability with the supplier. | Confirm availability with the supplier. |
| Product range | Check the references listed for the vehicle. | Available profiles and references vary by manufacturer. |
| Warranty | Check the applicable product terms. | Check the supplier’s and manufacturer’s product terms. |
How to Choose the Correct Part
The most important point is that the trim matches the vehicle’s actual insulation arrangement. The following information helps identify the specified component:
Information Needed for Verification
- Original or part reference: A legible reference on the existing component can support identification; verify its application.
- Vehicle identification number: The VIN supports a vehicle-specific catalogue lookup.
- Engine code: Different engine configurations may use different insulation or trim arrangements.
- Production date: Components may change between production periods within the same model.
- Body style: Saloon, hatchback and estate variants may have different bonnet arrangements.
Ordering without adequate vehicle information increases the risk of selecting an unsuitable part. Share the relevant details with the supplier and resolve uncertainties before ordering.
Pre-installation Checklist
Before fitting the replacement trim, carry out the following checks:
- Compare the new and old trim side by side for length and profile.
- Check the insulation edge thickness against the selected profile’s requirements.
- Ensure the retaining channels are clean and undamaged.
- Prepare the tools and materials specified for the job.
- Take care not to damage the liner when removing the old trim.
- Read the fitting instructions before installing the replacement.
- Work within the specified fitting conditions; some materials may become less flexible when cold.
Installation Tips and Recommendations
Installation requirements vary with the trim design. Use the vehicle and product instructions to determine the appropriate method.
Step-by-step Installation
1. Preparation: Clean the relevant area beneath the bonnet and carefully remove the old trim. Remove adhesive residue, if present, using a method compatible with the liner and specified fitting arrangement.
2. Measurement: Check the required length and route before fitting. Cut-to-length trim should only be shortened where the product instructions permit it; follow the specified coverage.
3. Cutting: If cutting is required, follow the specified corner and joint arrangement. There is no universal cutting angle suitable for every profile.
4. Fitting: Seat the trim on the insulation edge using the specified method. Retention may involve a clip-in or compression arrangement, depending on the design.
5. Checking: Work along the full length and check that each section is correctly seated without damaging the insulation.
Points Requiring Care
- Avoid fitting conditions outside the product’s instructions, particularly where cold affects flexibility.
- Do not stretch the trim excessively during fitting.
- Follow the specified joint arrangement at corners rather than assuming that overlapping is always appropriate.
- After fitting, close the bonnet carefully and check that the trim does not interfere with the latch or closure.
What to Check When Choosing Aftermarket Trim
Choose a traceable product from a reliable supplier and verify the stated application before purchase.
When assessing an aftermarket option:
- Consider established manufacturers with clear product information.
- Read the product description carefully.
- Provide the VIN and other relevant vehicle details accurately.
- Treat customer reviews as supporting information rather than proof of compatibility or performance.
- Check the warranty conditions.
- Check the return and exchange policy.
Do not assume that an aftermarket trim matches the original part’s performance or offers a particular saving. Compare documented suitability, specifications and current quotations for the products being considered.
Frequently Asked Questions
How Often Should Edge Trim Be Replaced?
There is no single replacement interval for every application. Follow the relevant maintenance guidance and replace damaged trim or trim that can no longer perform its intended function. Assess condition rather than relying on a general lifespan estimate.
Can the Insulation Be Used Without the Trim?
This depends on the specified retaining arrangement. Where trim is required to protect or retain the liner, missing trim should be addressed. Do not assume that an unsupported or damaged liner is acceptable.
Does Every Vehicle Use the Same Trim?
No. Different models and production versions may use different profiles. Select the part specified for the vehicle and its insulation arrangement.
Does Replacement Require Professional Help?
Some designs allow straightforward replacement by someone with suitable competence and instructions. Seek professional assistance if the liner needs replacement or the mounting arrangement is unclear.
Is Aftermarket Trim Different from the Original?
Specifications and quality vary between products. Verify the particular trim’s documented requirements and application; a general aftermarket label does not establish equivalence with the original.
Conclusion and Recommendations
Bonnet insulation edge trim is a small component that can contribute to liner retention, edge protection and a tidy appearance. Heat, environmental exposure and mechanical wear may cause deterioration over time.
Choose a product suited to the vehicle’s precise configuration. Use the original part reference, VIN, engine code and production date to support verification and reduce the risk of an unsuitable purchase.
When comparing original and aftermarket products, consider the budget alongside documented suitability and the supplier’s terms. Installation depends on the design; use the correct tools and fitting instructions, and seek assistance where needed.
Inspect the trim periodically and address deterioration promptly to help preserve the bonnet insulation’s condition and attachment.