
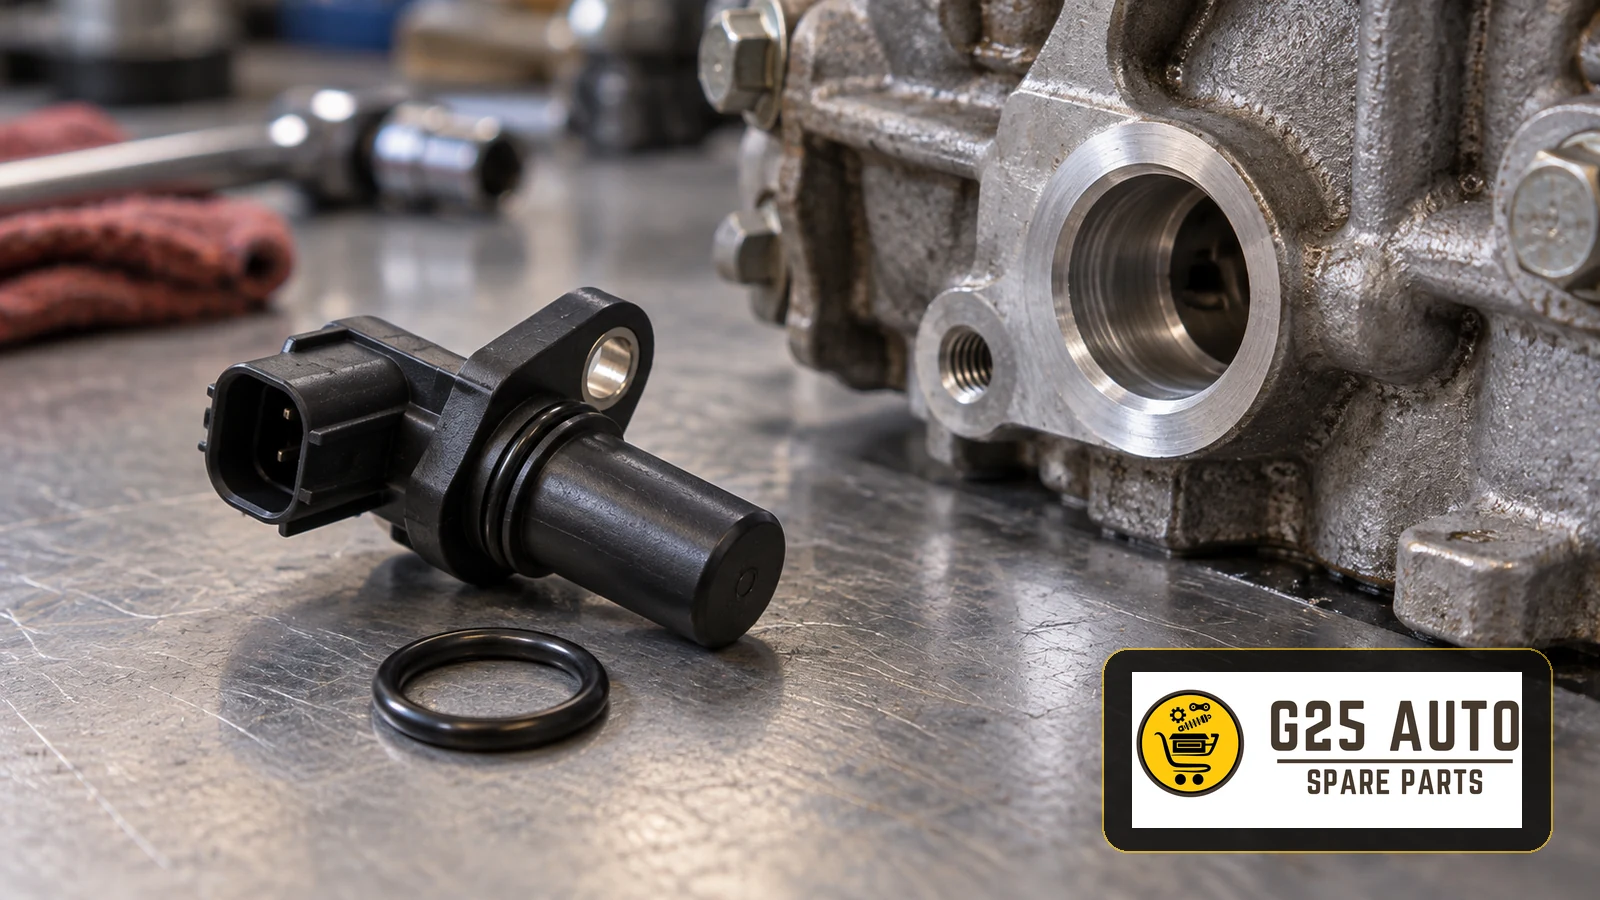
The crankshaft position sensor O-ring and mounting bore support correct engine management operation. The O-ring seals the sensor’s installation point, while the mounting arrangement holds the sensor in its specified position and maintains the required clearance. Correct fit and condition matter for sealing and reliable sensor operation. An unsuitable seal or damaged mounting can cause oil leakage or incorrect positioning; any associated running problems require diagnosis.
What Is a Crankshaft Sensor O-Ring and Why Does It Matter?
A crankshaft sensor O-ring is a sealing element with a circular cross-section, made from an elastomer specified for the application. Where this sealing arrangement is used, it sits between the sensor body and its mounting bore in the engine, helping prevent oil leakage and the entry of dirt or moisture.
Its functions and limits include:
- Sealing against oil leakage at the sensor mounting point.
- Helping prevent outside contaminants entering through that point.
- Supporting a correctly seated assembly; the specified fastener or retainer secures the sensor.
- Operating within the mounting area’s temperature conditions; the seal should not be treated as a heat-control device.
- Protecting the sealed area from contamination; an ordinary O-ring does not provide electrical interference shielding.
The Mounting Bore and Its Function
The sensor mounting bore is the opening or housing in which the sensor is located. Together with the sensor body and mounting features, it establishes the sensor’s position relative to the flywheel or crankshaft target wheel. Relevant features include:
- The correct retaining arrangement and fastener thread, where applicable.
- The specified bore depth and diameter tolerances.
- Suitable geometry for the O-ring seal.
- A sealing surface in the condition required by the manufacturer.
- Materials and dimensions appropriate to operating temperatures.
Fault Symptoms: When Is Replacement Needed?
Problems involving the O-ring or mounting area can present through indirect symptoms. These signs do not identify the faulty component on their own:
Signs of Engine Oil Leakage
- Oil wetness or accumulation around the crankshaft sensor.
- Oil drops beneath the engine.
- An unexplained fall in oil level.
- Oil contamination around the sensor connector.
Sensor Performance Problems
- An erratic engine speed indication.
- Intermittent engine running problems.
- Different behaviour when cold or hot.
- An illuminated engine warning light.
- Crankshaft sensor fault codes recorded by a diagnostic tool.
Mounting Area Problems
- A sensor that sits loosely in its mounting.
- A sensor that moves out of position under vibration.
- A retaining screw that does not hold or becomes loose.
- Cracking or corrosion around the mounting.
Methods for Confirming a Diagnosis
Observing symptoms and establishing a diagnosis are different processes. A professional assessment should determine whether the seal, mounting, sensor or another component is responsible:
Visual Inspection
With the engine cool and the vehicle prepared according to service instructions, remove the sensor where required for inspection. Check the O-ring for flattening, cracking, hardening or deformation. Inspect the mounting area for corrosion, cracks, damaged retaining threads and other deterioration.
Pressure and Leak Checks
A workshop can investigate the origin of oil leakage using the diagnostic procedures appropriate to that engine. Do not assume an oil-pressure test alone identifies an O-ring fault. Leakage around the sensor calls for inspection of the seal and adjacent surfaces before deciding which parts need replacement.
Dimensional Checks
Where the service procedure requires it, check the air gap between the sensor and the target wheel. Use the vehicle manufacturer’s specification and measurement method; a general clearance range is not a substitute for the value specified for that engine.
Original and Aftermarket Parts Compared
| Feature | Original Part | Aftermarket Part |
|---|---|---|
| Material quality | Verify the correct application specification | Check documented material suitability |
| Tolerances | Confirm the correct part reference | Verify dimensions and specified tolerances |
| Cost | Obtain a current quotation | Compare current quotations for suitable products |
| Supply time | Confirm availability with the supplier | Confirm availability with the supplier |
| Warranty conditions | Check applicable terms | Check applicable terms and documentation |
| Product range | Application-specific references | Coverage depends on the manufacturer |
Critical Checklist for Selecting the Correct Part
Part Selection Checklist
- Record the vehicle identification number (VIN).
- Identify the engine code.
- Establish the production year and month.
- Check the existing crankshaft sensor part number.
- Verify the relevant original part reference.
- Confirm the specified O-ring material and dimensions.
- Identify the retaining arrangement and thread specification where applicable.
- Obtain the specified air-gap requirement.
- Consult the technical service information or repair manual.
- Record the specified mounting torque.
Why Original Part References and Verification Matter
Even within one vehicle model, parts can differ with production date, engine version and intended market. Part reference verification therefore matters:
Why Is the Part Number Important?
Different production versions of a vehicle may use different O-ring diameters. An incorrect diameter can leave the assembly unsealed or damage the ring during installation. Similarly, revisions to the engine or mounting arrangement can change the required retaining fastener or housing details.
Verification Using the VIN
The VIN provides a basis for identifying the vehicle in the appropriate catalogue. Depending on the records available, a lookup can help establish:
- The relevant production date.
- The engine type and code.
- Production country and plant information.
- The original equipment specification.
A professional parts supplier can use the VIN and catalogue information to narrow the selection. This supports verification but does not remove the need to check the actual application and part specification.
Engine Code and Production Date
The engine code helps distinguish engine variants within the same vehicle model. Production details can identify technical revisions, including possible material changes. Confirm the code and date through the vehicle’s available identification and service records.
Installation Process and Points Requiring Attention
Consider the following when installing the seal and sensor:
Surface Preparation
The mounting bore must be clean and its sealing surface suitable for the specified assembly procedure. Remove old seal remnants without damaging the bore. Burrs or sharp edges need professional assessment; avoid uncontrolled material removal that could change the dimensions or sealing surface.
Positioning the O-Ring
Use only the lubricant and quantity permitted by the manufacturer for that seal and application. Do not assume engine oil is always appropriate. Fit the O-ring into its intended position and ensure it is not twisted, pinched or displaced as the sensor is installed.
Torque Values
The manufacturer specifies the sensor retaining screw torque. Excessive tightening can damage the sensor body or mounting, while insufficient tightening can allow movement. Follow the correct fastener and torque procedure for the application.
What to Check When Selecting an Aftermarket Part
An aftermarket part may be an option when its suitability is established. Assess the following criteria:
Manufacturer Reliability
Review the manufacturer’s traceability, documentation and relevant industry credentials. General quality-management certification or a brand’s reputation alone does not prove that an individual seal meets the required application specification.
Material Specifications
The O-ring material must be compatible with the oil, temperature and chemical conditions specified for the engine. NBR, FKM and HNBR are examples of elastomer families used in automotive sealing, but they are not automatically interchangeable. Follow the specified material and grade rather than selecting by a general material description.
Technical Support and Documentation
Look for relevant technical drawings, installation instructions and application information from the supplier. If the documentation needed to establish suitability is unavailable, resolve that uncertainty before ordering or installing the product.
Frequently Asked Questions
How Often Should the O-Ring Be Replaced?
Follow the vehicle manufacturer’s instructions, including any requirement for a new seal after sensor removal. A damaged or unsuitable ring needs replacement. Do not apply a universal routine interval or assume every seal can be reused.
What Should Be Done if the Mounting Bore Is Damaged?
Minor surface contamination or corrosion may be treatable using an approved procedure. Damaged threads, cracks or significant wear require specialist assessment. A repair or insert is appropriate only where an approved repair method permits it.
How Should Different O-Ring Materials Be Compared?
Choose the material specified for the application. Temperature, oil compatibility and seal design all matter. Neither the use of synthetic oil alone nor a general claim that one elastomer is better establishes which ring is correct.
Can the Air Gap Be Adjusted?
Some sensors have a fixed mounting depth, while other arrangements allow adjustment. Follow the manufacturer’s specification and procedure for the particular system rather than assuming the gap is adjustable or automatically correct.
Does an Aftermarket O-Ring Affect the Warranty?
Warranty conditions depend on the applicable terms and circumstances. Read the documentation and seek clarification from the relevant provider if necessary; do not assume that an aftermarket label either preserves or invalidates cover.
Conclusion and Recommendations
The crankshaft sensor O-ring and mounting area appear simple but matter for sealing and correct sensor positioning. Verify the VIN application, engine code, production details and part reference when selecting a replacement. Have symptoms professionally assessed to establish the actual fault.
When comparing original and aftermarket parts, consider vehicle age, warranty conditions, operating environment and budget alongside documented suitability. Reliable results depend on the correct specification, installation and maintenance.
Follow the manufacturer’s installation instructions, prepare the sealing surfaces carefully and apply the specified tightening procedure. Renew the seal where instructed or where its condition requires it, and inspect the mounting area during the work.
Avoid rushing selection or deciding solely on price. Use a traceable supplier and relevant technical documentation to reduce the risk of an unsuitable purchase and support reliable repair decisions.