
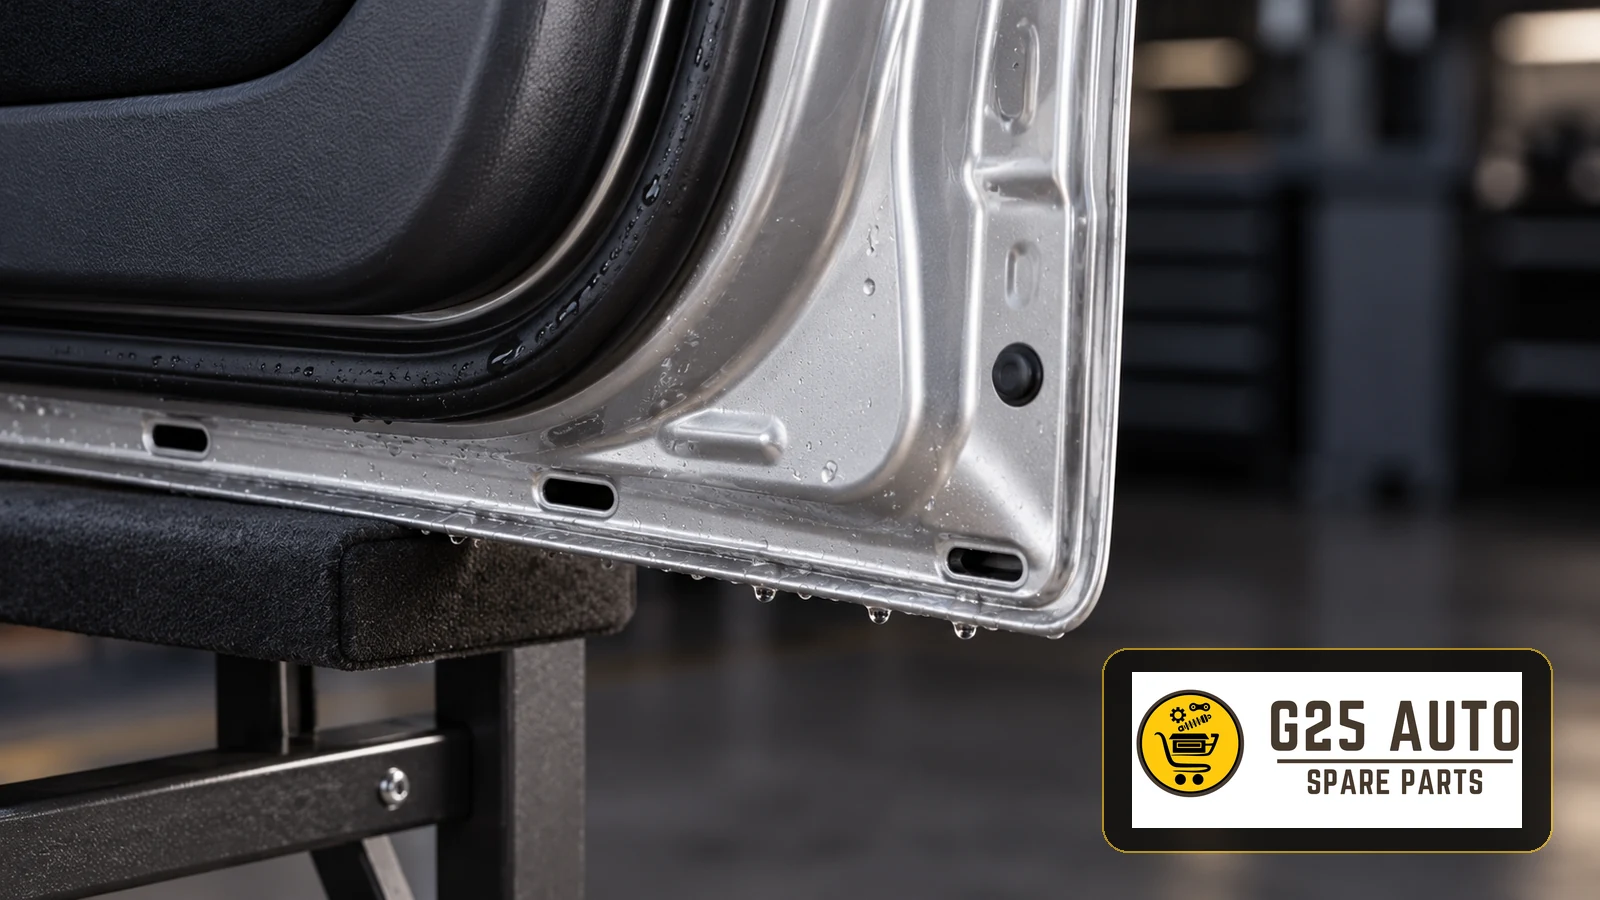
Door drain openings and seals help rainwater and moisture that enter the door escape, reducing the risk of rust and corrosion. Blocked openings or worn seals can allow water to collect inside the door, causing odours and potentially leading to structural damage over time. Regular inspection and cleaning can help prevent these problems.
What Is the Door Drainage System, and Why Does It Matter?
Modern vehicle doors have drainage openings along their lower edge to release water that enters the door cavity. Depending on the design, rubber seals or plastic covers may be fitted nearby. Water and moisture entering around the window can leave the vehicle through these openings.
If the drainage system becomes blocked, trapped water can affect electrical components, damage the window regulator mechanism and encourage rust. This maintenance is particularly relevant for vehicles operating in wet conditions.
Signs of Blocked Door Drains
The following symptoms can indicate a drainage problem:
- A sloshing sound inside the door or water spilling out when it is opened
- Unusual water leakage from the bottom of the door, or no drainage when water is trapped inside
- A musty or damp smell from behind the door panels
- A window motor that runs slowly or struggles to move the window
- Damp patches or water stains on the interior door trim
- Rust or blistering paint along the bottom of the door
- Excess moisture and misting inside the vehicle during rainy weather
These symptoms do not necessarily mean the drains are blocked, but they warrant inspection. A professional assessment is recommended to establish the cause.
How to Check Drain Openings and Seals
Visual Inspection
Start with a visual inspection. Examine the lower edge of each door carefully. Drain openings are generally located along the bottom frame and may be exposed or partly concealed. Check rubber seals for cracks, hardening or missing sections.
Functional Check
A suitable drainage cleaning tool can help check whether an opening is clear, where the vehicle’s service procedure permits it. Avoid thick, rigid or sharp objects that could enlarge the opening or damage surrounding surfaces. A small, controlled amount of water can also be used to observe whether drainage is unobstructed, following the vehicle’s instructions.
Inspection Inside the Door
A more detailed inspection may require removal of the interior door trim. This allows the window regulator, wiring and other components to be checked for moisture or water damage. Standing water or damp marks inside the door can indicate a drainage problem.
Maintenance and Cleaning Procedure
Materials Required
- A soft plastic cleaner or suitable drainage cleaning tool
- An air nozzle or compressor, where permitted by the service procedure
- A silicone-based protective product approved for the particular seal material
- Clean water and a suitable mild detergent solution
- A soft cloth or microfibre towel
- A torch or inspection lamp
Step-by-Step Cleaning
1. Preparation: Park the vehicle on level ground and open the doors. Work in a well-lit area.
2. Locate the Openings: Inspect the lower edge of each door and identify its drainage openings. Their number and position vary with the door design.
3. Remove Surface Debris: Remove dirt, mud and leaf fragments from around the openings by hand or with a soft brush.
4. Clear the Openings: Gently clear accessible blockages with an appropriate plastic drainage tool. Do not force the tool into the door or damage the surrounding coating.
5. Compressed Air: Use low-pressure air only if the vehicle’s procedure allows it. Excessive pressure can damage sealing components inside the door.
6. Water Check: After cleaning, use a small amount of water in accordance with the service procedure to confirm that it drains freely.
7. Seal Care: Clean the rubber seals and check their flexibility. Remove them only where the design and service instructions allow it. Hardened or cracked seals may need replacement.
8. Protection: Where approved for the material, apply a suitable silicone-based seal care product to help maintain flexibility.
Replacing Seals: Original and Aftermarket Options
When a drainage-related seal needs replacement, the main options are original parts and aftermarket alternatives. Both require attention to their specifications and application.
Original Parts
Original parts are specified for the vehicle manufacturer’s applications. Selecting the correct part reference remains essential for fit and installation. Costs should be checked for the particular part rather than assumed from its category.
Aftermarket Parts
Aftermarket seals can provide an alternative when their specifications suit the application. Consider the following when selecting a replacement:
- Material quality: check that the rubber compound, such as EPDM where specified, is suitable for the application
- Dimensions and fit: verify the vehicle make, model, production details and seal profile
- Manufacturer standards: check relevant technical documentation and any claimed certification
- Warranty terms: confirm the actual coverage offered for the selected part
Check compatibility using the VIN, applicable vehicle details and production date. An incorrect part can cause installation problems and loss of function. For G25Auto B2B enquiries across Europe and the Balkans, provide these details when comparing replacement options.
Original and Aftermarket Seal Comparison
| Feature | Original Part | Aftermarket Alternative |
|---|---|---|
| Compatibility | Verify the exact application and part reference | Verify the application and relevant cross-reference |
| Material Quality | Check the specified material for the application | Check documented material specifications |
| Supply Time | Confirm with the supplier | Confirm with the supplier |
| Cost | Request a quotation for the selected part | Compare quotations for suitable alternatives |
| Warranty | Check the applicable manufacturer or seller terms | Check the applicable supplier terms |
| Installation | Confirm the correct reference and fitting procedure | Confirm dimensions, profile and fitting procedure |
Maintenance Checklist
Use the following checklist as part of routine maintenance:
- ☐ Inspect door drains at intervals suited to the vehicle’s instructions and operating conditions
- ☐ Check and clean the drains before periods of wet weather
- ☐ Look for rust along the bottom edges of the doors
- ☐ Check seal flexibility and condition
- ☐ Listen for unusual noises or water sloshing inside the doors
- ☐ Observe drainage after rain
- ☐ Check the interior door trim for dampness
- ☐ Check that the window regulator operates correctly
- ☐ Seek professional assistance where necessary
- ☐ Retain warranty documents for replacement parts
Why Parts Compatibility Must Be Verified
Selecting the correct replacement is essential when replacing a drain seal or related component. Parts can differ between production years or vehicle variants, even within the same make and model.
Details to Verify
Vehicle Identification Number (VIN): The VIN is an important reference for checking the vehicle’s parts application. It can be found in the vehicle documents or on the vehicle body, but should be used alongside the relevant catalogue information.
OEM or Part Reference: A reference marked on the original component can help identify a replacement or a documented aftermarket cross-reference. Record any markings when the old seal is removed.
Engine Code: Provide this if requested by the supplier or parts catalogue as part of the vehicle identification details. Its relevance to a door seal depends on the particular catalogue application.
Production Date: Parts may change during a model year. Use the manufacturing date rather than relying only on the date of first registration.
Sharing the relevant details with the parts supplier helps reduce incorrect orders and avoid unnecessary delays.
Frequently Asked Questions
How Often Should Door Drains Be Cleaned?
Follow the vehicle’s maintenance guidance and adjust inspections to use and environmental conditions. Wet or dusty operating conditions can justify more frequent checks, especially if debris builds up around the openings.
Can a Blocked Drain Damage the Window Motor?
Water trapped inside a door can reach the window motor or electrical components and cause faults or short circuits. Prolonged dampness can also encourage corrosion in the regulator mechanism.
Can I Replace a Seal Myself?
Some accessible seals can be replaced with basic practical skills, depending on their design. Where door trim removal is required, clips or electrical components can be damaged. Seek professional assistance if you are unsure of the procedure.
Do Aftermarket Seals Have a Shorter Service Life?
Service life depends on material quality, manufacturing, fit and operating conditions. Original or aftermarket status alone does not establish durability. Assess the specific product’s documented specifications rather than assuming equivalent performance.
What Happens If a Drain Opening Is Enlarged?
An opening damaged during cleaning can affect the surrounding finish or sealing arrangement and may require repair. Have the area assessed using the vehicle manufacturer’s repair guidance rather than fitting an improvised seal that could obstruct drainage.
Can Door Drains Freeze in Winter?
In very cold conditions, retained water can freeze and obstruct drainage. Cleaning before winter helps keep the openings clear. Use protective products only where they are approved for the particular seals and vehicle application.
When Is Professional Assistance Needed?
A professional workshop may be the appropriate choice in the following situations:
- The interior door trim is difficult to remove
- Water damage to electrical components is suspected
- Structural damage to the drainage system is found
- There is extensive rust or corrosion inside the door
- The window regulator is malfunctioning
- The correct replacement part cannot be confidently identified
A professional workshop can inspect the affected components, investigate the source of the problem and recommend an appropriate repair.
Conclusion
Door drains and seals are small components with an important role in protecting the door from moisture damage. Routine inspection and suitable cleaning can help prevent more serious problems. Simple visual checks can reveal blockages or deterioration before damage develops.
When replacement is needed, use the VIN, relevant part references and production details to select the correct component. Assess documented quality and compatibility when choosing between original and aftermarket options. Either option requires verification for the particular vehicle.
Include drainage checks in routine vehicle maintenance rather than waiting for water accumulation or corrosion to become apparent. A small inspection today can help identify a problem before a more extensive repair is needed.