
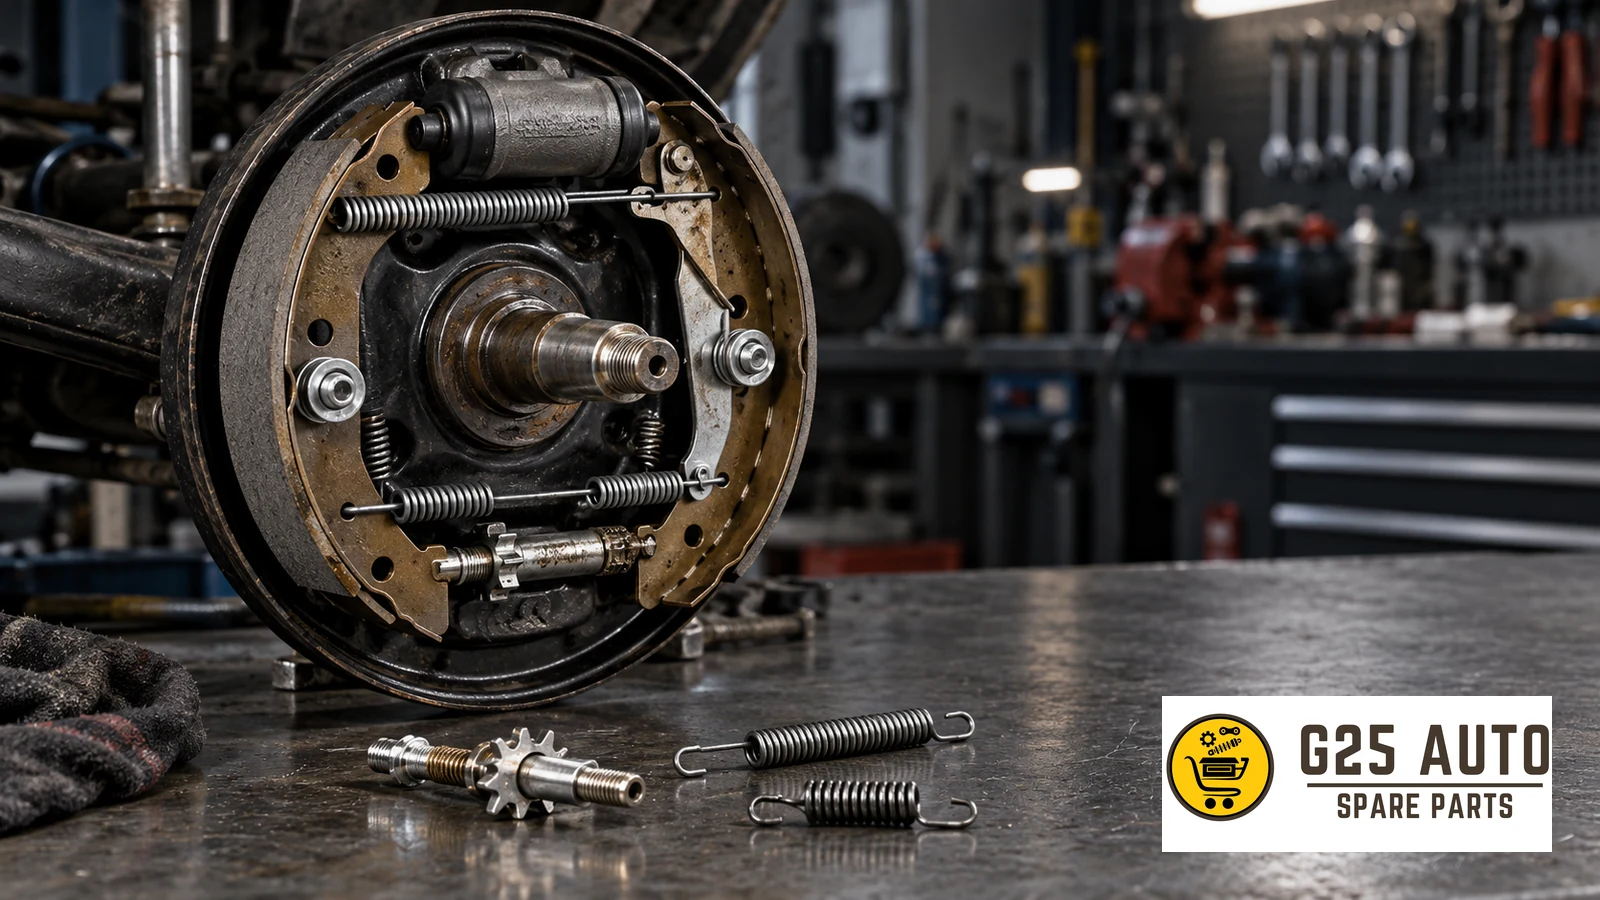
Drum brake shoe adjusters and springs are critical components that help the braking system work correctly. The adjuster compensates for shoe wear in automatic systems, while the springs retract and locate the shoes. Faults in these components can reduce braking efficiency, cause uneven wear and create safety problems.
What Is a Drum Brake Adjuster and How Does It Work?
An automatic drum brake adjuster compensates for friction lining wear to help maintain the correct shoe-to-drum clearance. Depending on the design, it responds to excess movement in the brake mechanism and adjusts the clearance when required.
The mechanism may include a toothed wheel, guide pin and adjusting strut. Its operating conditions depend on the brake design; when the relevant movement exceeds the specified range, the mechanism advances. This helps maintain clearance without routine manual intervention, although inspection and initial adjustment may still be necessary.
Main Adjuster Components
The adjuster consists of several important parts. The star wheel sets the distance between the shoes and drum. Adjusting levers and hooks form the mechanical linkage that triggers automatic adjustment. Where fitted, a stop or retaining pin helps control movement within the intended range.
These components are made to defined tolerances and must work together correctly. Wear or breakage in one part can prevent the adjustment system from operating.
Drum Brake Spring Functions and Types
The springs in a drum brake perform different tasks. Return springs pull the shoes away from the drum when the brake pedal is released. Hold-down springs retain the shoes against the backing plate and help keep them correctly positioned.
Functions of Different Spring Types
Return springs provide the force needed to retract the shoes; their position and arrangement vary with the brake design. Additional shoe springs help control shoe movement. An adjuster spring maintains the tension needed for the adjustment mechanism to operate.
Each spring has a specified tension and elastic behaviour. Using the wrong spring can impair braking performance and cause premature wear of other components.
Fault Symptoms and Diagnostic Differences
Adjuster and spring faults can produce similar symptoms, so diagnosis requires careful inspection. Recognising a symptom is different from establishing its cause.
Common Fault Symptoms
Increased brake pedal travel is one possible symptom. Excess heat on one side may indicate a broken spring or an adjuster fault. Clicking or squeaking during braking can suggest loose or broken springs, although other causes are possible.
A rubbing noise from the drum after braking may suggest that the shoes are not retracting fully. If the vehicle pulls to one side, unequal adjustment between the left and right drum brakes is one possible explanation.
Checks Needed for a Reliable Diagnosis
The drum must be removed for a visual inspection. Check the springs for breakage, cracks and correct positioning. Inspect the adjuster for free movement, worn teeth and correct star-wheel operation in accordance with the vehicle procedure.
Measuring the drum’s internal diameter against its service limits helps identify excessive wear. Checking shoe-to-drum clearance helps assess adjustment. Symptoms alone cannot establish a reliable diagnosis; professional inspection is required.
Adjusters and Springs Compared
| Feature | Adjuster Mechanism | Brake Springs |
|---|---|---|
| Main function | Automatic compensation for shoe-to-drum clearance | Retracting and retaining the shoes |
| Possible fault symptoms | Increased pedal travel or recurring need for adjustment | Persistent rubbing or incomplete brake release |
| Inspection timing | At scheduled brake inspections and when symptoms occur | At each shoe replacement and during brake inspection |
| Service life | Depends on condition, use and the manufacturer’s requirements | Renew according to condition and the applicable service procedure |
| Replacement requirements | Technical knowledge and correct adjustment procedure | Suitable spring tools and correct installation procedure |
Choosing and Verifying the Correct Parts
Vehicle application is the key consideration when choosing drum brake components. An incorrect part can seriously compromise brake operation.
Checking OEM Part References
Vehicle manufacturers use original equipment part references to identify components. These references support application checks but should be matched against the relevant vehicle and brake system details. Compare the applicable references when ordering adjusters and spring kits.
Even within one vehicle model, brake systems can differ by production year or revision. Earlier and later versions may therefore require different adjuster mechanisms.
Why the VIN and Engine Code Matter
The vehicle identification number, or VIN, helps identify the vehicle’s build specification. The engine code identifies the engine variant. Brake equipment may vary between vehicle versions, so the engine alone should not be used to determine the required brake parts.
Providing the VIN and engine code when ordering helps reduce selection errors. Production date also matters because manufacturers can introduce design changes during a model year.
Original and Aftermarket Parts
Original parts are supplied for the vehicle manufacturer’s specified applications and design requirements. Their suitability still depends on selecting the correct reference for the actual vehicle. Price and performance should be assessed for the specific product rather than assumed from its category.
Aftermarket parts are alternatives produced by independent manufacturers for the intended function. Product quality, application coverage and cost vary; an aftermarket label alone does not establish equivalence to the original part.
Both options require careful evaluation, especially for safety-critical components. For European and Balkan B2B orders, compare documented application information, manufacturer specifications and any relevant product evidence before selecting a supplier.
Maintenance and Inspection Checklist
Regular inspection helps maintain safe, reliable drum brake operation:
- Inspect spring condition whenever the shoes are replaced and renew springs when required.
- Check that the adjuster mechanism moves correctly.
- Inspect the drum’s inner surface for abnormal wear or cracks.
- Check the star-wheel teeth for wear or damage.
- Look for corrosion or fatigue cracks at spring mounting points.
- Check for uneven shoe wear, which may indicate an adjustment problem.
- Check for excessive drum heating after brake operation.
- Measure and record pedal free play at the specified service checks.
- Lubricate only the adjuster points specified by the manufacturer, using the prescribed lubricant; keep it off the drum’s friction surface and shoe linings.
- After fitting new parts, complete the prescribed checks and a controlled brake test before returning the vehicle to service.
Installation and Adjustment Tips
Drum brake installation requires care. Use suitable brake spring pliers or the specified spring tool. Trying to fit springs with a screwdriver or unsuitable tool can cause injury or damage the spring.
Adjuster Installation Sequence
Position the shoes and fit their hold-down hardware in the sequence specified for the vehicle. Assemble the adjuster components according to the manufacturer’s diagram. Set the star wheel to the prescribed initial position rather than assuming that fully closed is correct for every design.
Fit the return springs at the stage specified in the service procedure, taking account of their strong tension. Once all components are in place, check the adjustment mechanism as instructed. Check drum rotation and shoe contact against the specified requirements.
Initial Adjustment and Testing
After assembly, use the star wheel to establish the specified shoe-to-drum clearance. Follow the manufacturer’s rotation or drag criteria and back-off instructions rather than applying a universal number of clicks. Check each wheel individually.
Activate the automatic adjuster using the procedure for that brake design; reversing and braking is not applicable to every system. Recheck pedal feel and adjustment at the specified stage and investigate any abnormality before releasing the vehicle.
Frequently Asked Questions
How Often Should Drum Brake Springs Be Replaced?
Inspect the springs at each shoe replacement and renew them if there is loss of tension, cracking or significant corrosion. Follow the applicable replacement requirements; a fixed number of shoe changes is not a universal service interval.
How Does an Adjuster Fault Affect Braking?
If the adjuster fails to compensate for shoe wear, the gap between the shoes and drum can increase. This can lengthen pedal travel and impair braking. A severe fault may leave insufficient braking even with substantial pedal movement.
Can Replacing a Spring on Only One Side Cause Problems?
Different spring condition across an axle can affect shoe retraction and braking balance. Inspect both sides and follow the manufacturer’s requirements for replacing springs or complete hardware sets. Do not assume that an isolated replacement restores balanced operation.
Is It Safe to Use an Aftermarket Adjuster?
An aftermarket adjuster should be assessed for the correct application and documented product quality. A brand name or general certification claim alone does not establish suitability. Verify the actual product and obtain it from a traceable supplier.
How Often Should Drum Brake Adjustment Be Checked?
Automatic adjusters reduce the need for routine manual adjustment, but they do not remove the need for inspection. Check pedal free play and brake operation at the specified service intervals. Investigate abnormalities with a detailed inspection and check adjustment whenever the shoes are replaced.
Conclusions and Recommendations
Drum brake shoe adjusters and springs play an important role in safe, efficient braking. Regular inspection and timely maintenance support both safety and long-term maintenance planning.
Recognising symptoms early can help limit further damage. Professional inspection is still needed to establish the cause: symptoms provide clues, while the drum’s internal components require examination.
Application verification is central to part selection. Check the relevant OEM references, VIN, engine code and production date. Evaluate original and aftermarket options using their documented suitability for the vehicle and brake system.
For safety-critical brake components, appropriate product quality, maintenance and correct installation support reliable service and help avoid unnecessary costs. They do not guarantee a particular service life.
The braking system is fundamental to vehicle safety. If there is any uncertainty, consult a qualified workshop to protect the vehicle’s occupants and other road users.