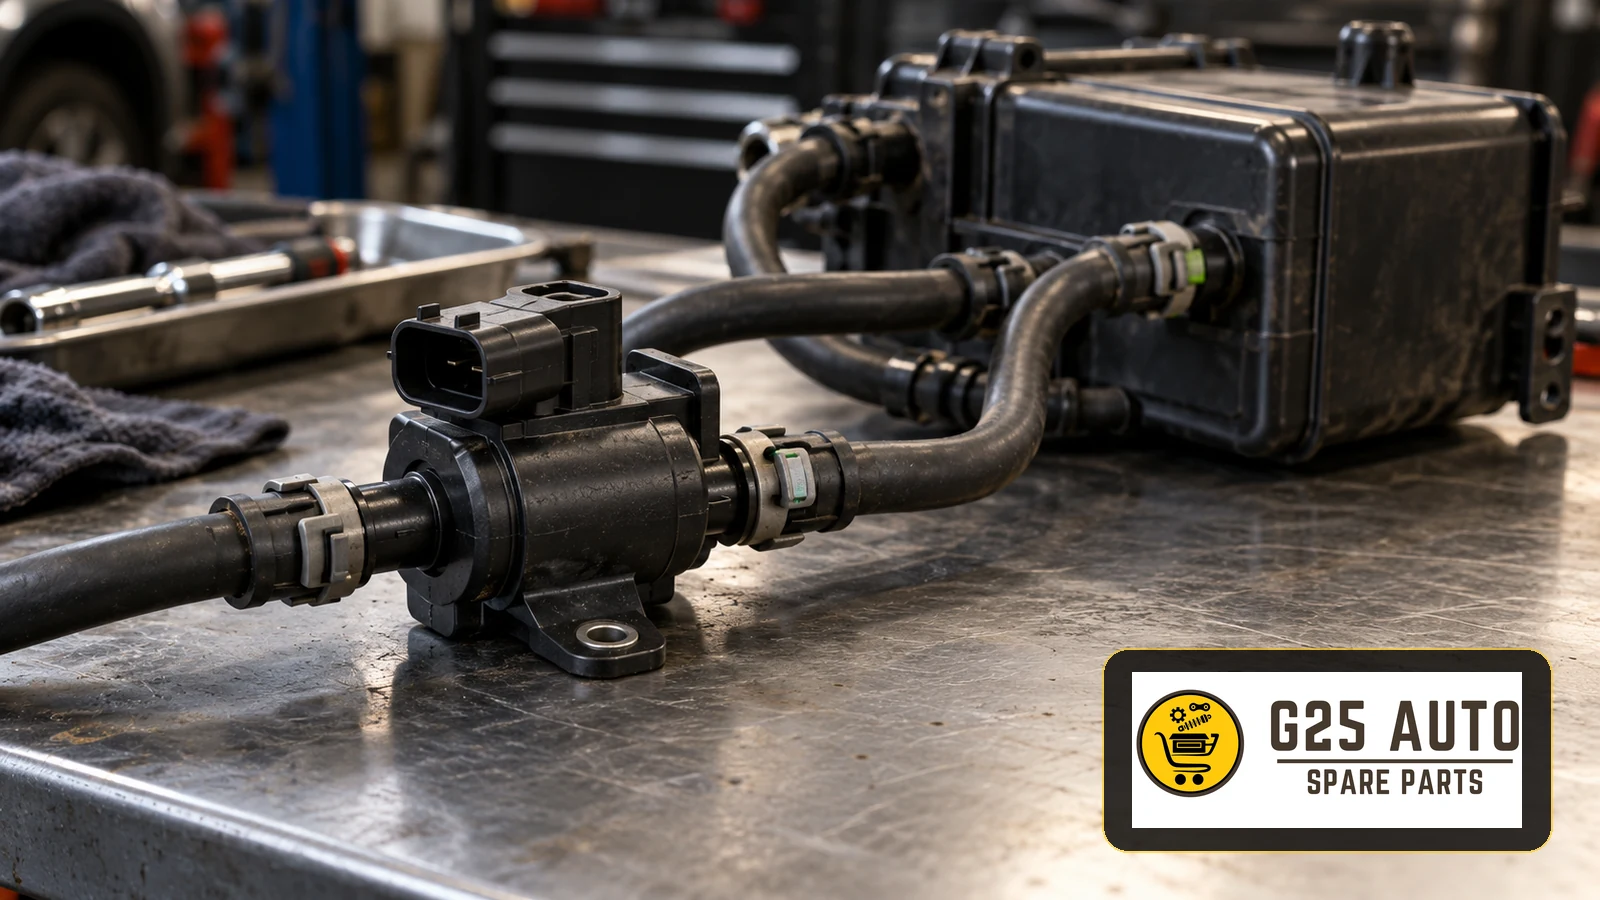
The EVAP canister purge valve is part of the emission control system that prevents fuel tank vapours escaping into the atmosphere. During suitable engine operating conditions, it controls vapour flow towards the intake manifold for combustion. This helps reduce pollution and recover fuel vapours. Vapour lines form the pipe network connecting the components.
What Is EVAP and How Does It Work?
EVAP (evaporative emission control) is used to control fuel vapour emissions. By capturing vapours formed in the tank before they escape, it reduces hydrocarbon emissions. Depending on design, the main components include:
- Fuel tank and cap
- Activated charcoal canister
- Purge valve
- Vent valve
- Vapour lines and connections
- Sensors and control module
The Canister Purge Valve’s Role
This electrically operated solenoid is controlled by the engine control unit (ECU). When the engine is running under suitable conditions, the ECU opens it to transfer stored canister vapours into the intake manifold. They then enter the combustion chambers as part of the fuel-air mixture.
Opening timing and duration depend on temperature, engine speed, load and other operating conditions. This control manages vapour flow while limiting disruption to engine operation.
Fault Symptoms: When to Investigate
Some EVAP faults cause few immediate drivability changes. Possible symptoms include:
Common Symptoms
- Illuminated check-engine light
- Unusual hissing when opening the cap
- Fuel smell, especially when parked
- Unsteady idle
- Emissions inspection problems
- Increased fuel consumption
- Difficult cold starting
Note: These symptoms have other possible causes. Professional diagnosis is needed.
Diagnosis: Identifying the Fault
Professional diagnosis commonly uses an OBD-II (on-board diagnostics) scanner to read fault codes stored in the engine control unit. Codes guide investigation rather than prove which component needs replacement.
Common EVAP Fault Codes
| Code | Description | Possible causes |
|---|---|---|
| P0440 | General EVAP malfunction | Leak or valve fault |
| P0441 | Incorrect purge flow | Blocked line or purge valve |
| P0442 | Small leak | Cap, cracked line or connection |
| P0443 | Purge control circuit malfunction | Connection or valve coil |
| P0455 | Large leak | Open cap, disconnected line or valve |
| P0456 | Very small leak | Fine crack or seal |
| P0457 | Leak associated with cap | Loose or missing cap |
Professional Diagnostic Steps
A workshop may follow these checks using vehicle-specific procedures:
- Read OBD-II codes
- Review freeze-frame data
- Check the fuel cap
- Inspect lines and connections
- Smoke-test for leaks
- Test purge valve electrics and operation
- Check canister and vent valve
- Perform specified pressure/vacuum tests
Vapour Line Problems and Inspection Points
Plastic and rubber lines can develop:
- Age-related cracking, particularly near the engine
- Mechanical or impact damage
- Loose connections
- Blockages from dirt or nesting insects
- Kinks or breaks following incorrect installation
Vapour Line Checklist
Visual Inspection Points
- Cracks, splits or holes
- Secure clamps
- Clearance from hot exhaust parts
- Chafing against sharp edges
- Discolouration suggesting overheating
- Correct routing
- Fuel smell or wetness
- Secure canister and valve connections
Choosing Original or Aftermarket Parts
When a purge valve or vapour line needs replacing, buyers can compare original (OEM) and aftermarket options. Both have potential advantages and points requiring attention. Check documented specifications, the actual application and commercial terms.
Original (OEM) Parts
Potential advantages:
- Manufacturer application documentation
- Documented warranty terms
- Traceable quality requirements
- Vehicle-specific catalogue identification
Considerations:
- Compare quoted cost
- Confirm supply times
- Check distribution options
Aftermarket Parts
Potential advantages:
- Alternative purchasing options
- Different supplier networks
- Additional sourcing channels
- Products with documented application specifications
Considerations:
- Quality varies between products
- Verify compatibility
- Choose a reliable supplier
Comparison Table
| Factor | Original part | Aftermarket part |
|---|---|---|
| Compatibility | Verify application | Verify application |
| Quality | Check specifications | Check supporting documentation |
| Cost | Request quotation | Compare quotations |
| Supply time | Confirm individually | Confirm individually |
| Warranty | Check manufacturer terms | Check supplier terms |
| Availability | Check distribution | Check supplier channels |
Choosing the Correct Part: Compatibility Checks
EVAP components can vary by vehicle model, engine type, production year and vehicle specification. Even vehicles from the same model year may use different versions. Confirm identification before ordering.
Information Required for Compatibility Checks
Essential Checks
- VIN: Vehicle identification
- Engine code: Confirm from vehicle documentation
- Production date: Changes occur within model years
- Original part reference: Read the existing component marking
- Equipment: Check system specification
Use these details together with supplier catalogues. VIN lookup supports identification but does not replace checking applicable variants.
Installation and Precautions
Replacement requires technical knowledge. Incorrect installation can cause leaks, malfunction and drivability problems.
Before Installation
- Confirm the replacement part
- Photograph existing routing
- Identify connections and orientation
- Prepare specified clamps and seals
- Keep the workspace clean
- Follow specified electrical isolation procedures
- Follow vehicle-specific fuel-system precautions
During Installation
- Avoid excessive line bending
- Avoid overtightening clamps on plastic lines
- Seat electrical connectors securely
- Connect lines in their correct positions and routing
- Recheck all connections
- Follow specified code-clearing and post-repair testing procedures
Maintenance and Service Life
Maintenance requirements vary. Useful precautions include:
- Close the cap as specified
- Use a correctly specified cap
- Use suitable fuel
- Investigate the check-engine light promptly
- Include EVAP checks in relevant inspections
- Check line condition during seasonal inspections
Frequently Asked Questions
Does a purge valve fault affect driving?
Effects vary. Warning lights, consumption or drivability changes may occur; assess the actual fault.
Will replacing the cap solve the problem?
Only if the cap is responsible. Even P0457 requires confirmation before replacement.
Can EVAP faults affect emissions inspections?
Fault codes and incomplete readiness monitors can affect results, depending on inspection requirements.
How often should the purge valve be replaced?
No universal interval applies. Replace according to diagnosis and manufacturer guidance.
Can vapour lines be repaired?
Use the specified repair or replacement method after locating the leak.
Do aftermarket parts have warranties?
Check the supplier’s written terms before ordering.
Sourcing Parts and Choosing Reliable Suppliers
European and Balkan B2B buyers should seek documented quality and application information. For aftermarket purchases, review supporting product and testing information rather than assuming equivalent performance.
Record the vehicle’s technical details and check catalogue matches with the supplier. Detailed application information helps identify the correct component.
Consider quality and fitment alongside price: repeat faults and labour can increase total cost.
Conclusion
Purge valves and vapour lines help control evaporative emissions. Early investigation supports effective repairs.
Use OBD-II data, appropriate leak testing and systematic checks instead of speculative replacement.
Verify original and aftermarket applications using vehicle identifiers and existing part references; production variants matter.
Installation requires technical knowledge and may need professional assistance. Incorrect connections can cause system faults and emissions problems. Post-repair checks help confirm that the work is complete.
Appropriate parts, inspection and professional diagnosis support reliable system operation and effective emission control.